Jira plugin
The following instructions will walk you through installing the Qwiet Plugin for Jira.
Prerequisites
You must have administrative privileges for Qwiet and Jira to set up the integration.
The Qwiet Plugin for Jira currently supports a maximum of 1000 users.
Step 1: Add the Qwiet plugin to your Jira account
- Log into your Jira instance with an administrator account. Using the navigation bar in the header, go to Apps > Explore more apps.
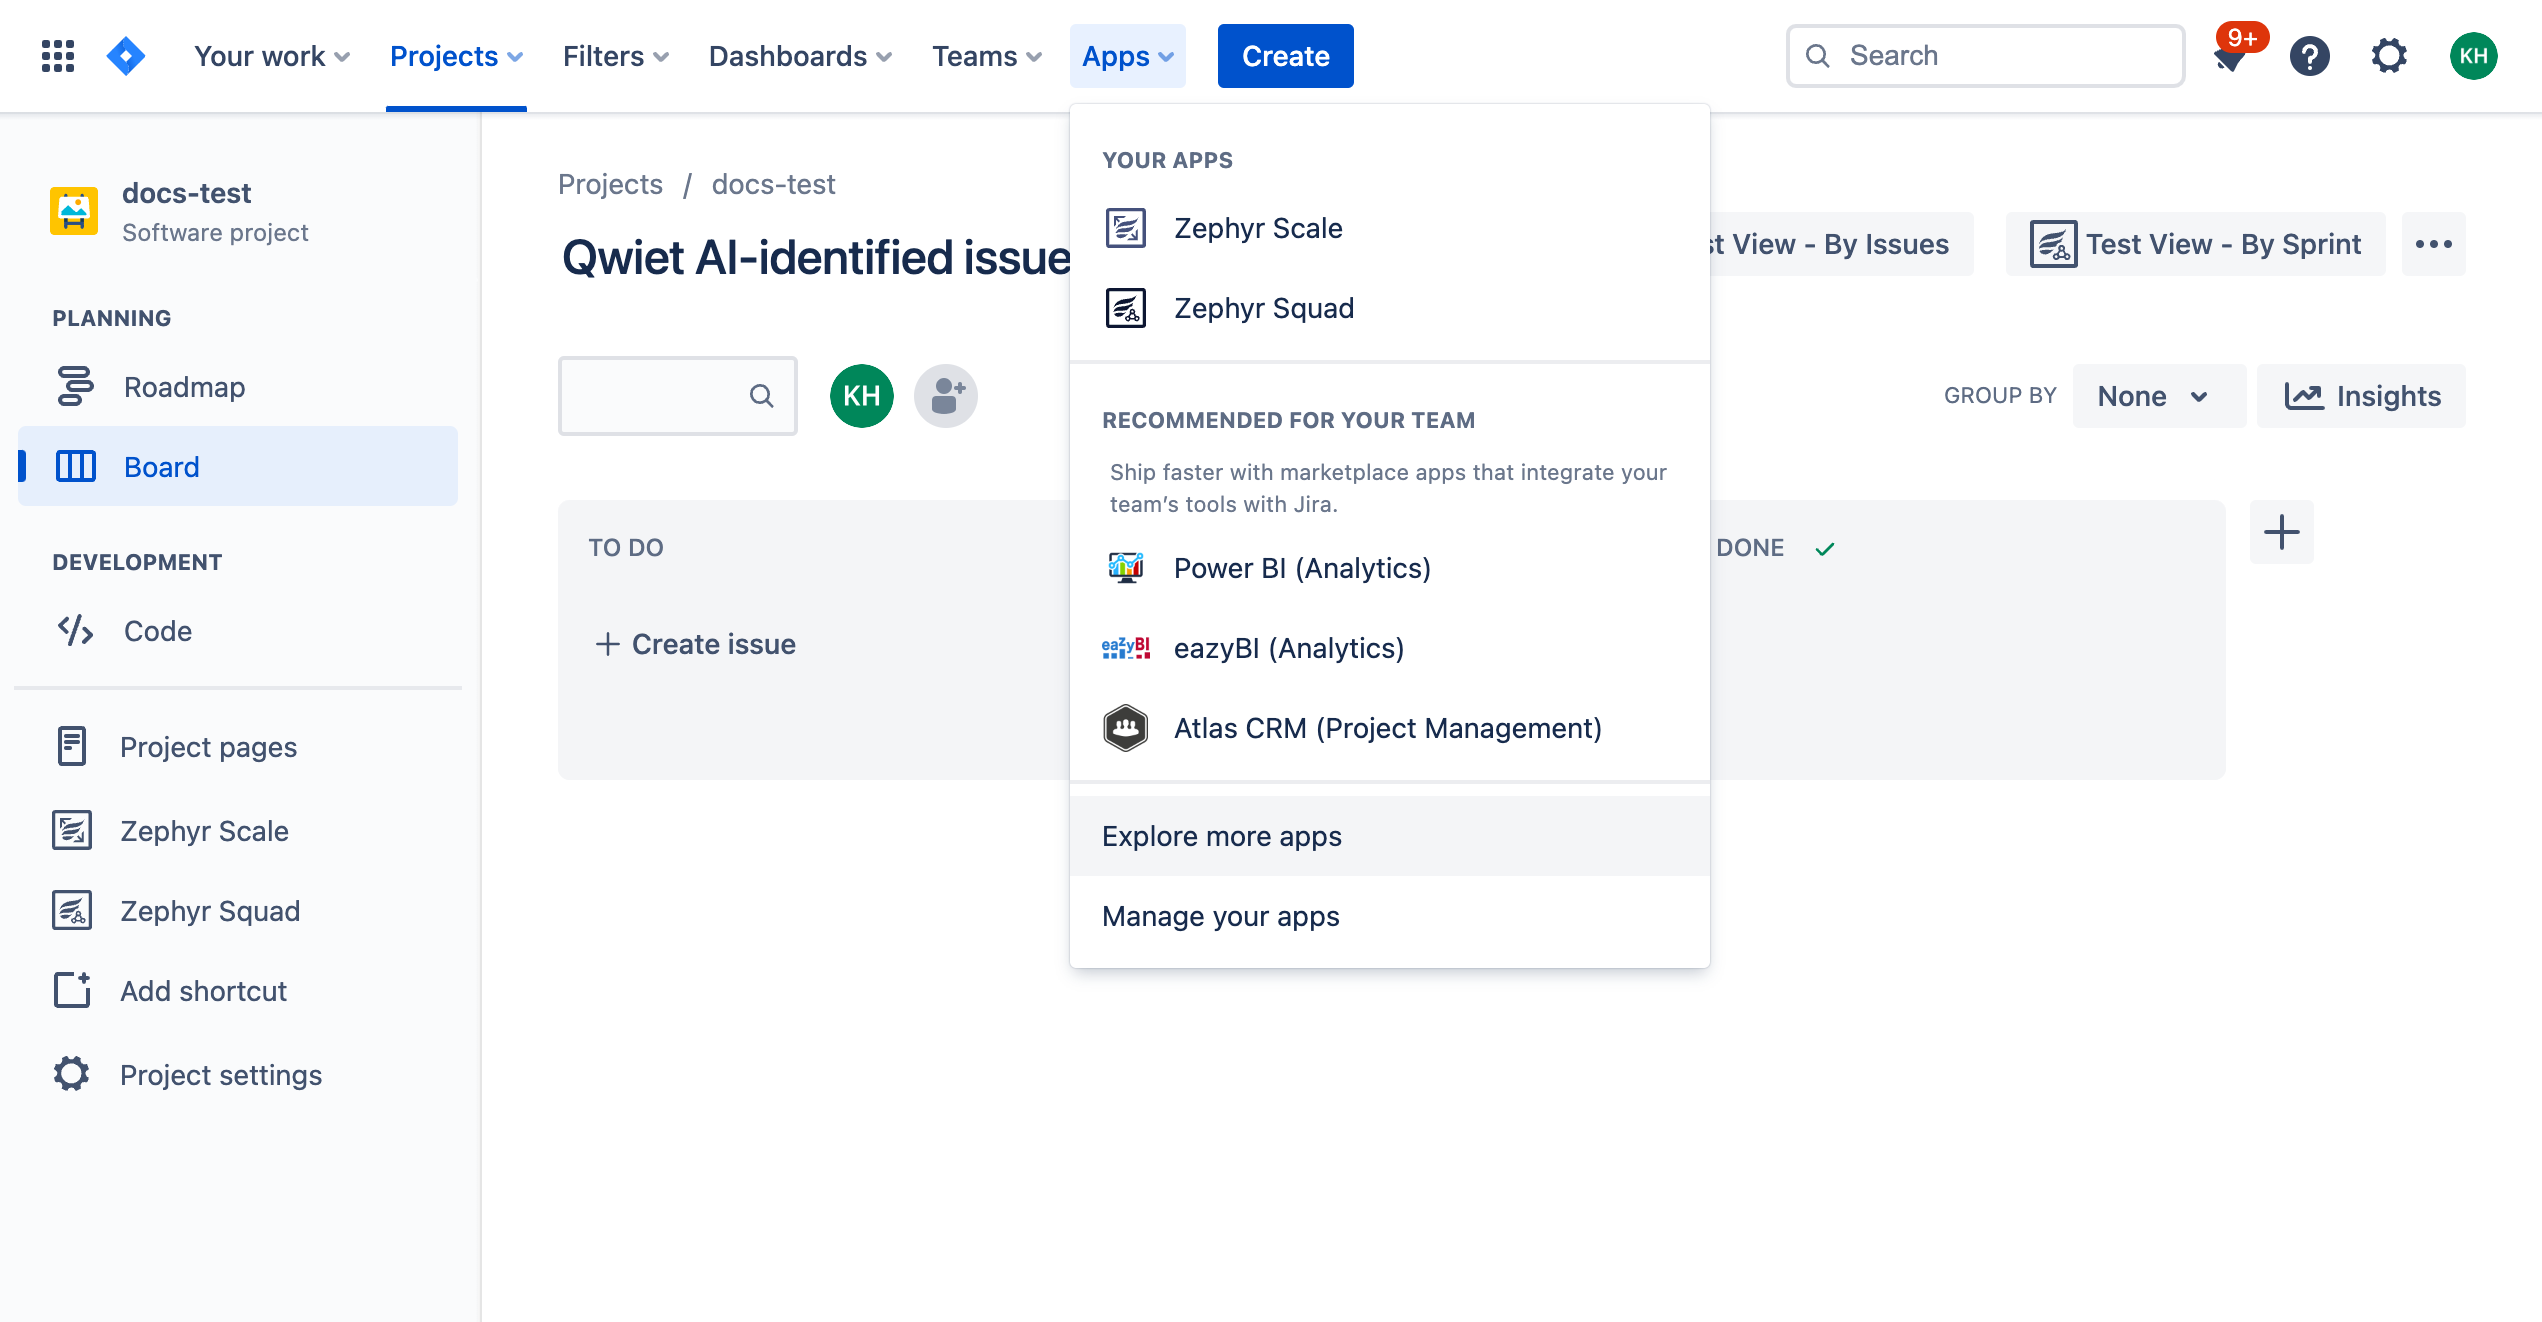
- Use the search bar to search for Qwiet AI and open up the Qwiet AI app.
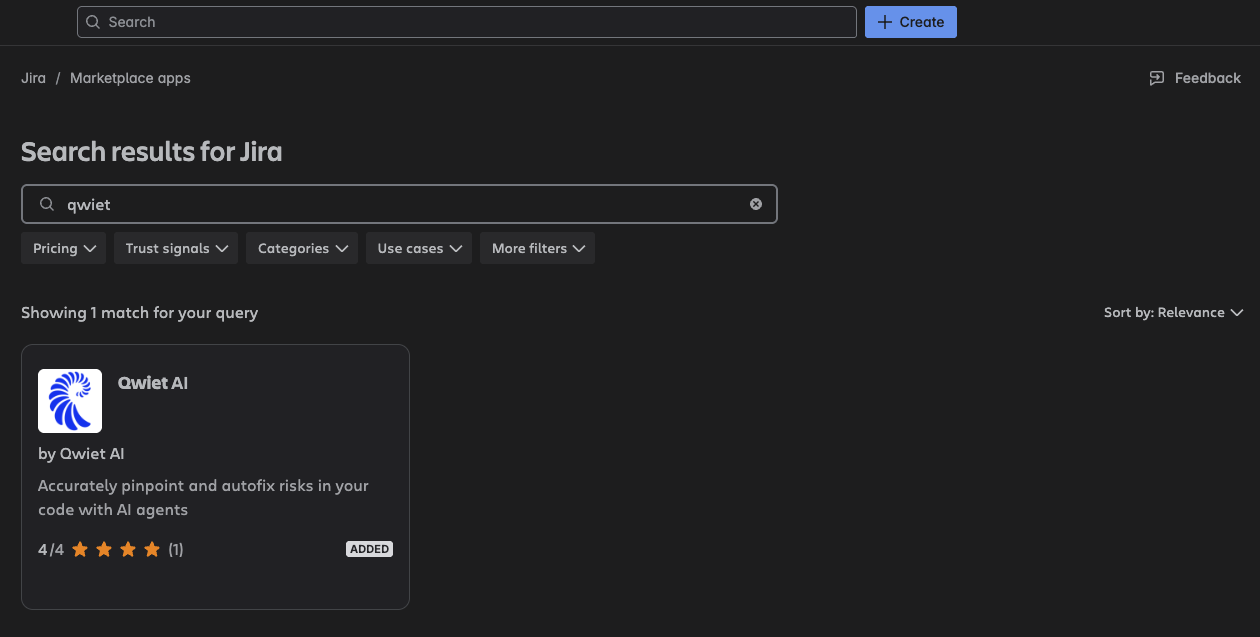
-
Click Get app. In the Add to Jira window that opens, click Get it now.
-
Jira will let you know when the installation is successful. At this point, you will find Qwiet listed whenever you navigate to Apps > Manage your apps.
Step 2: Create the integration token
You will need to create an integration token whose value you will provide to Jira later.
-
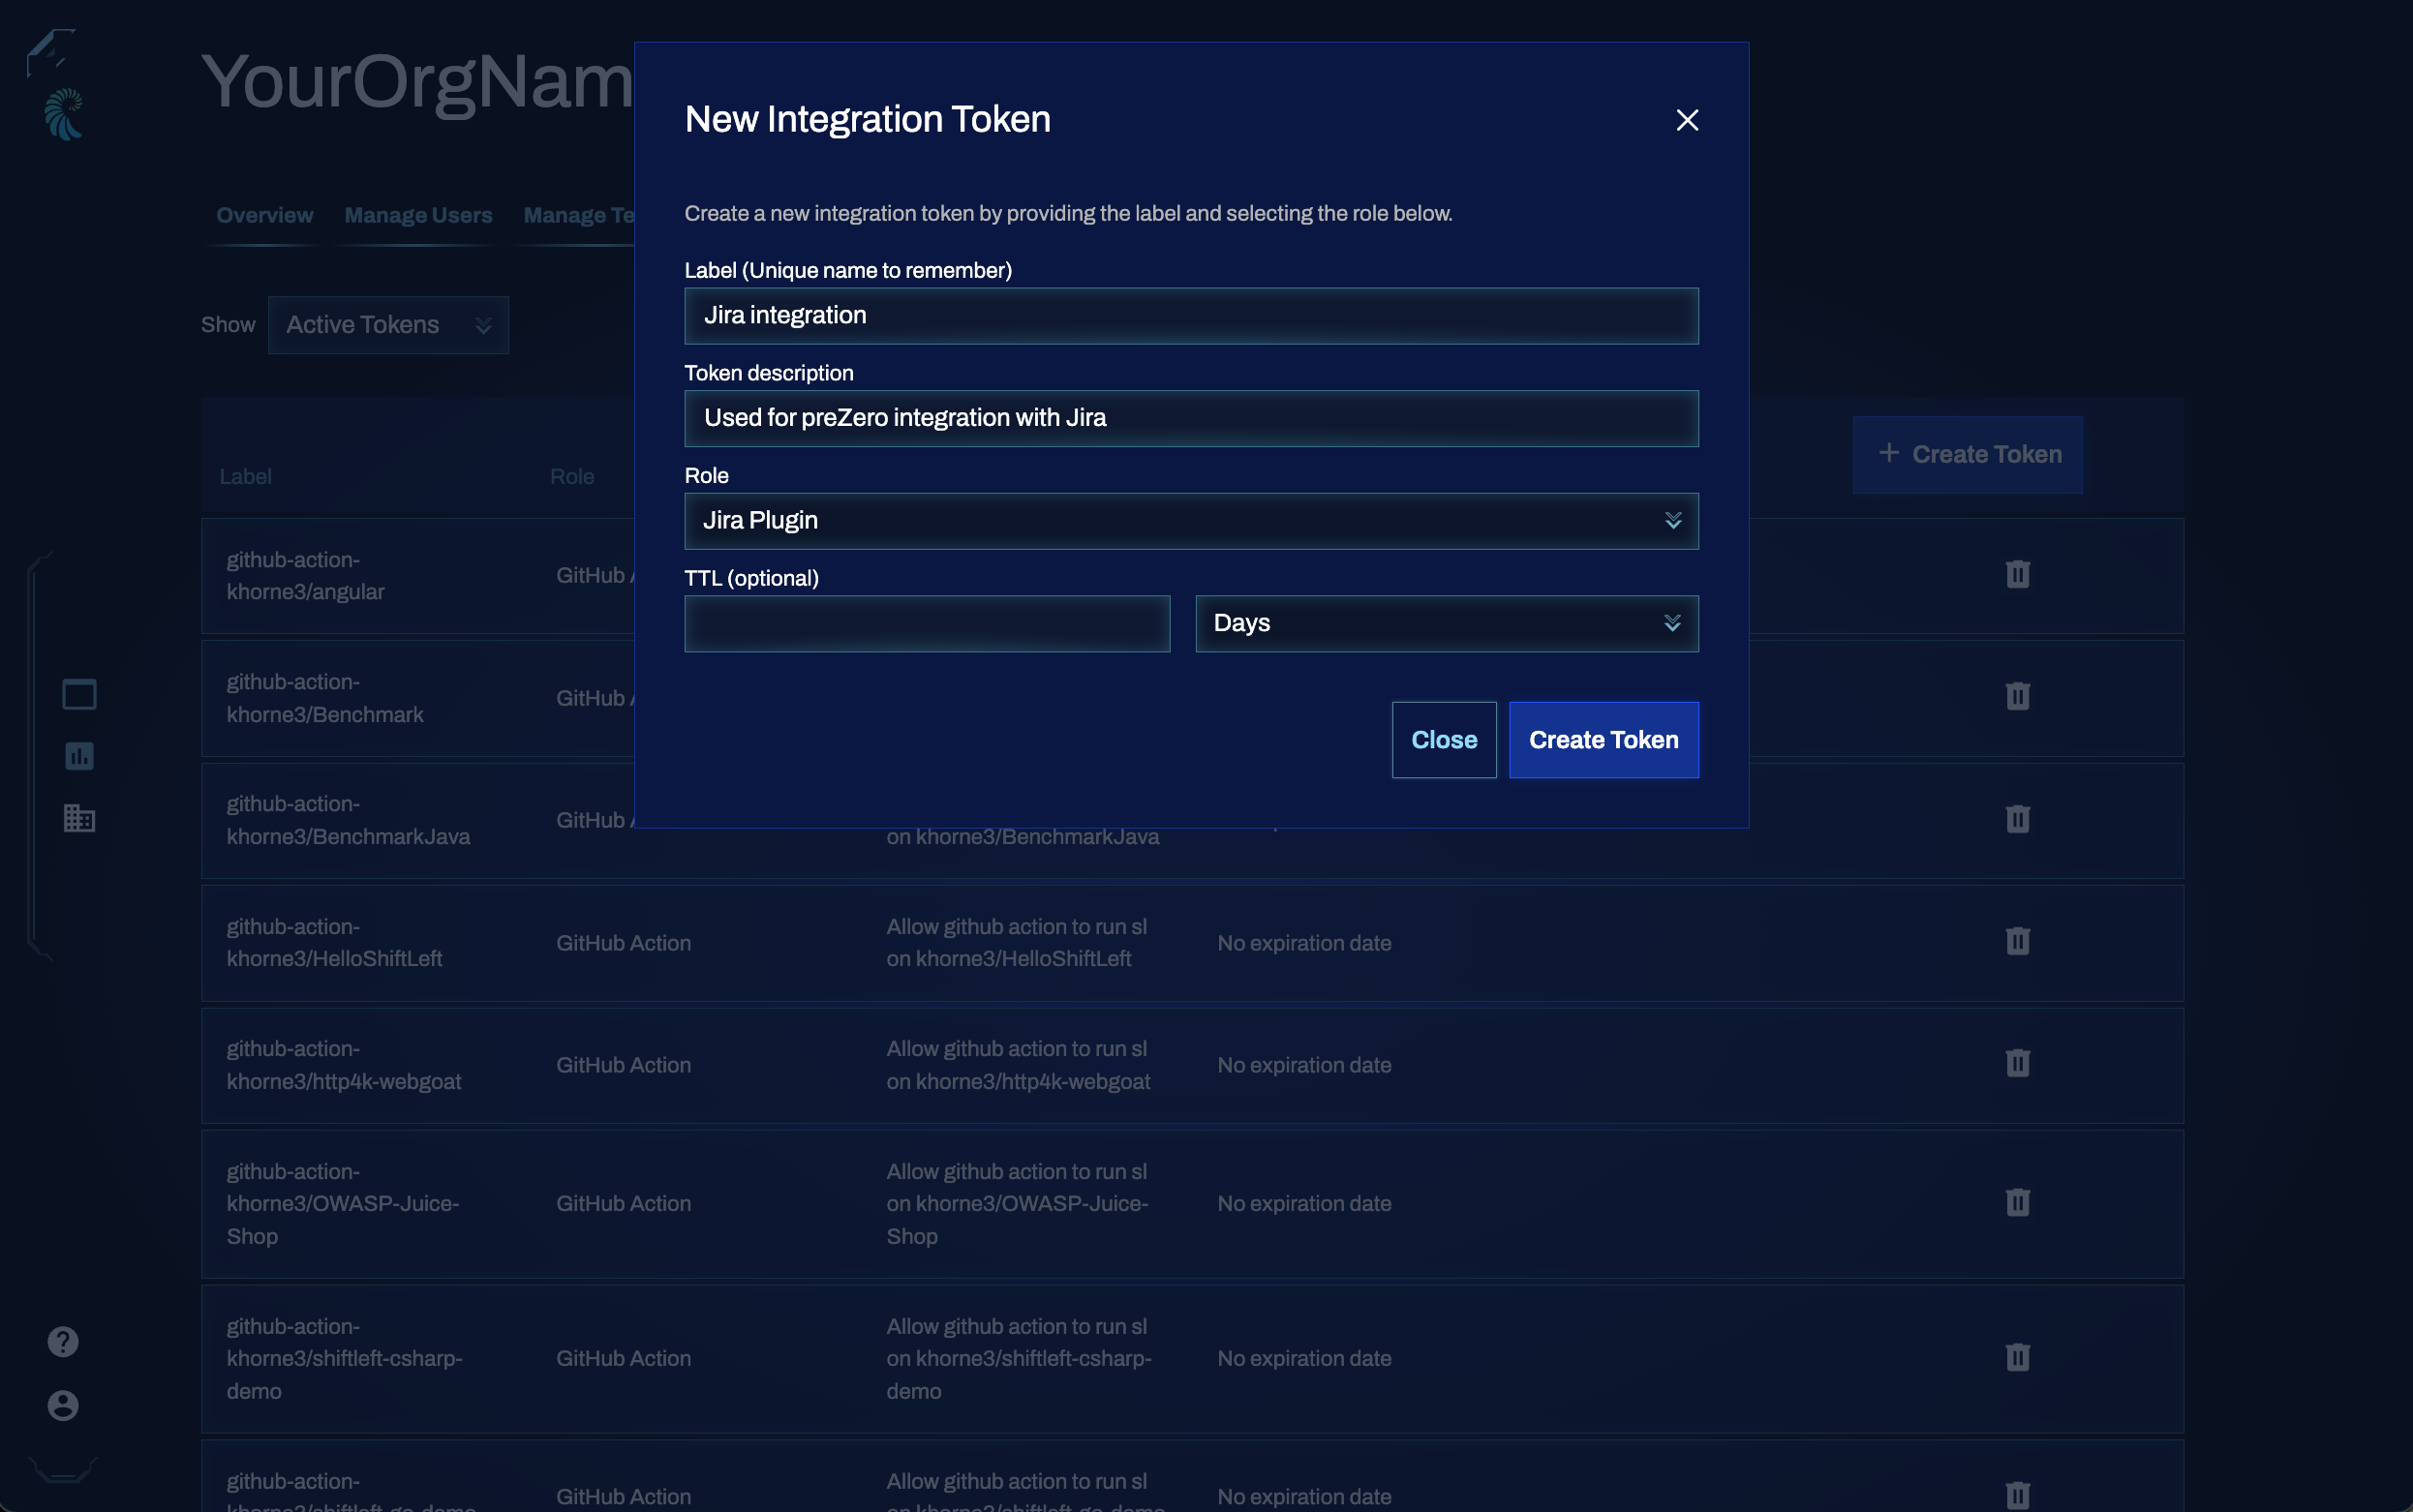
Log into the Qwiet Dashboard and go to Integrations. Click the plus (+) sign, and when prompted:
- Provide a label (or unique name) for the token
- Provide a token description (optional)
- Choose a role (select Jira Plugin )
- Provide a TTL value that sets the length of time for which the token will be valid (optional)
-
Click Create Token to proceed.
You'll be shown your token and your OrgID, which you'll provide during the plugin configuration process. You can only view your token once, so please be sure to save its value before closing out of the dialog window.
Step 3: Add fields to hold Qwiet AI data in the Jira task
-
In the left-hand navigation bar, select Project Settings > Issue types. This redirects you to the Task configuration screen.
-
Using the search bar available in the right-hand Fields panel, search for SL. Drag and drop SL Findings Detail and SL Finding ID to the center of the page where it says Context Fields.
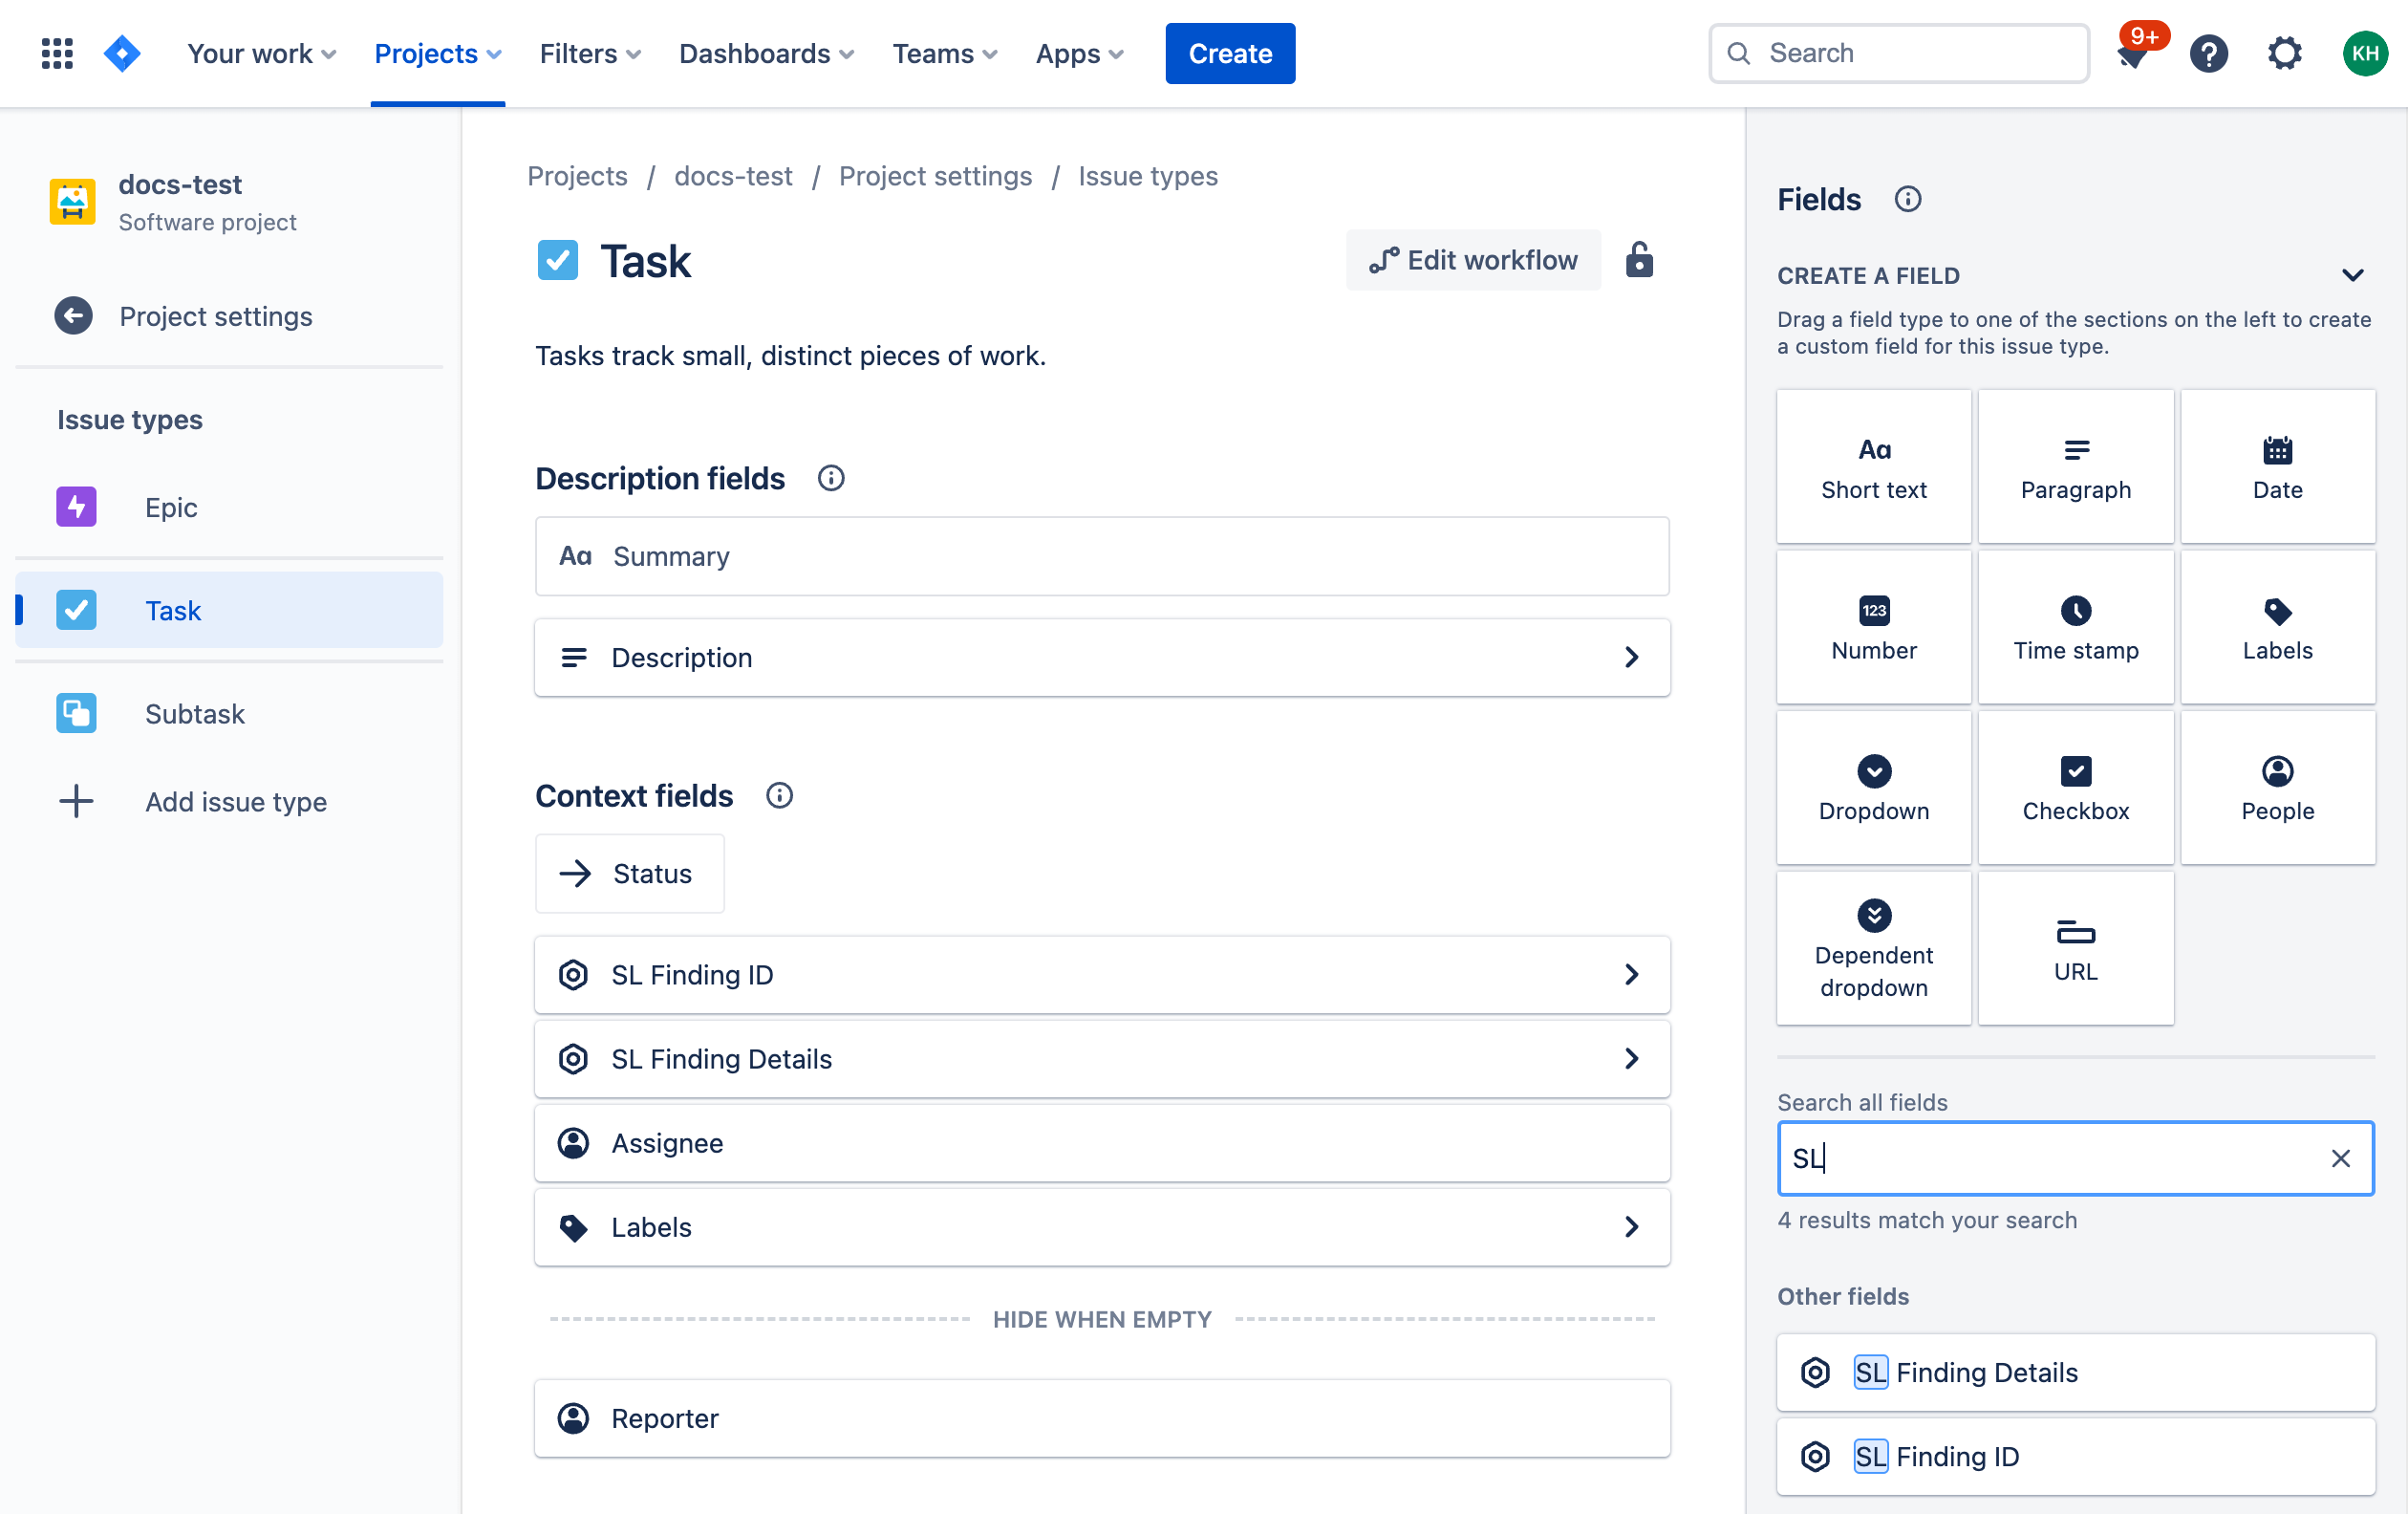
If you want the Jira plugin to create Bugs, Epics, or Subtasks, you will need to repeat the process of adding SL Findings Detail and SL Finding ID to the config for each issue type.
- When done, click Save changes at the bottom of the screen.
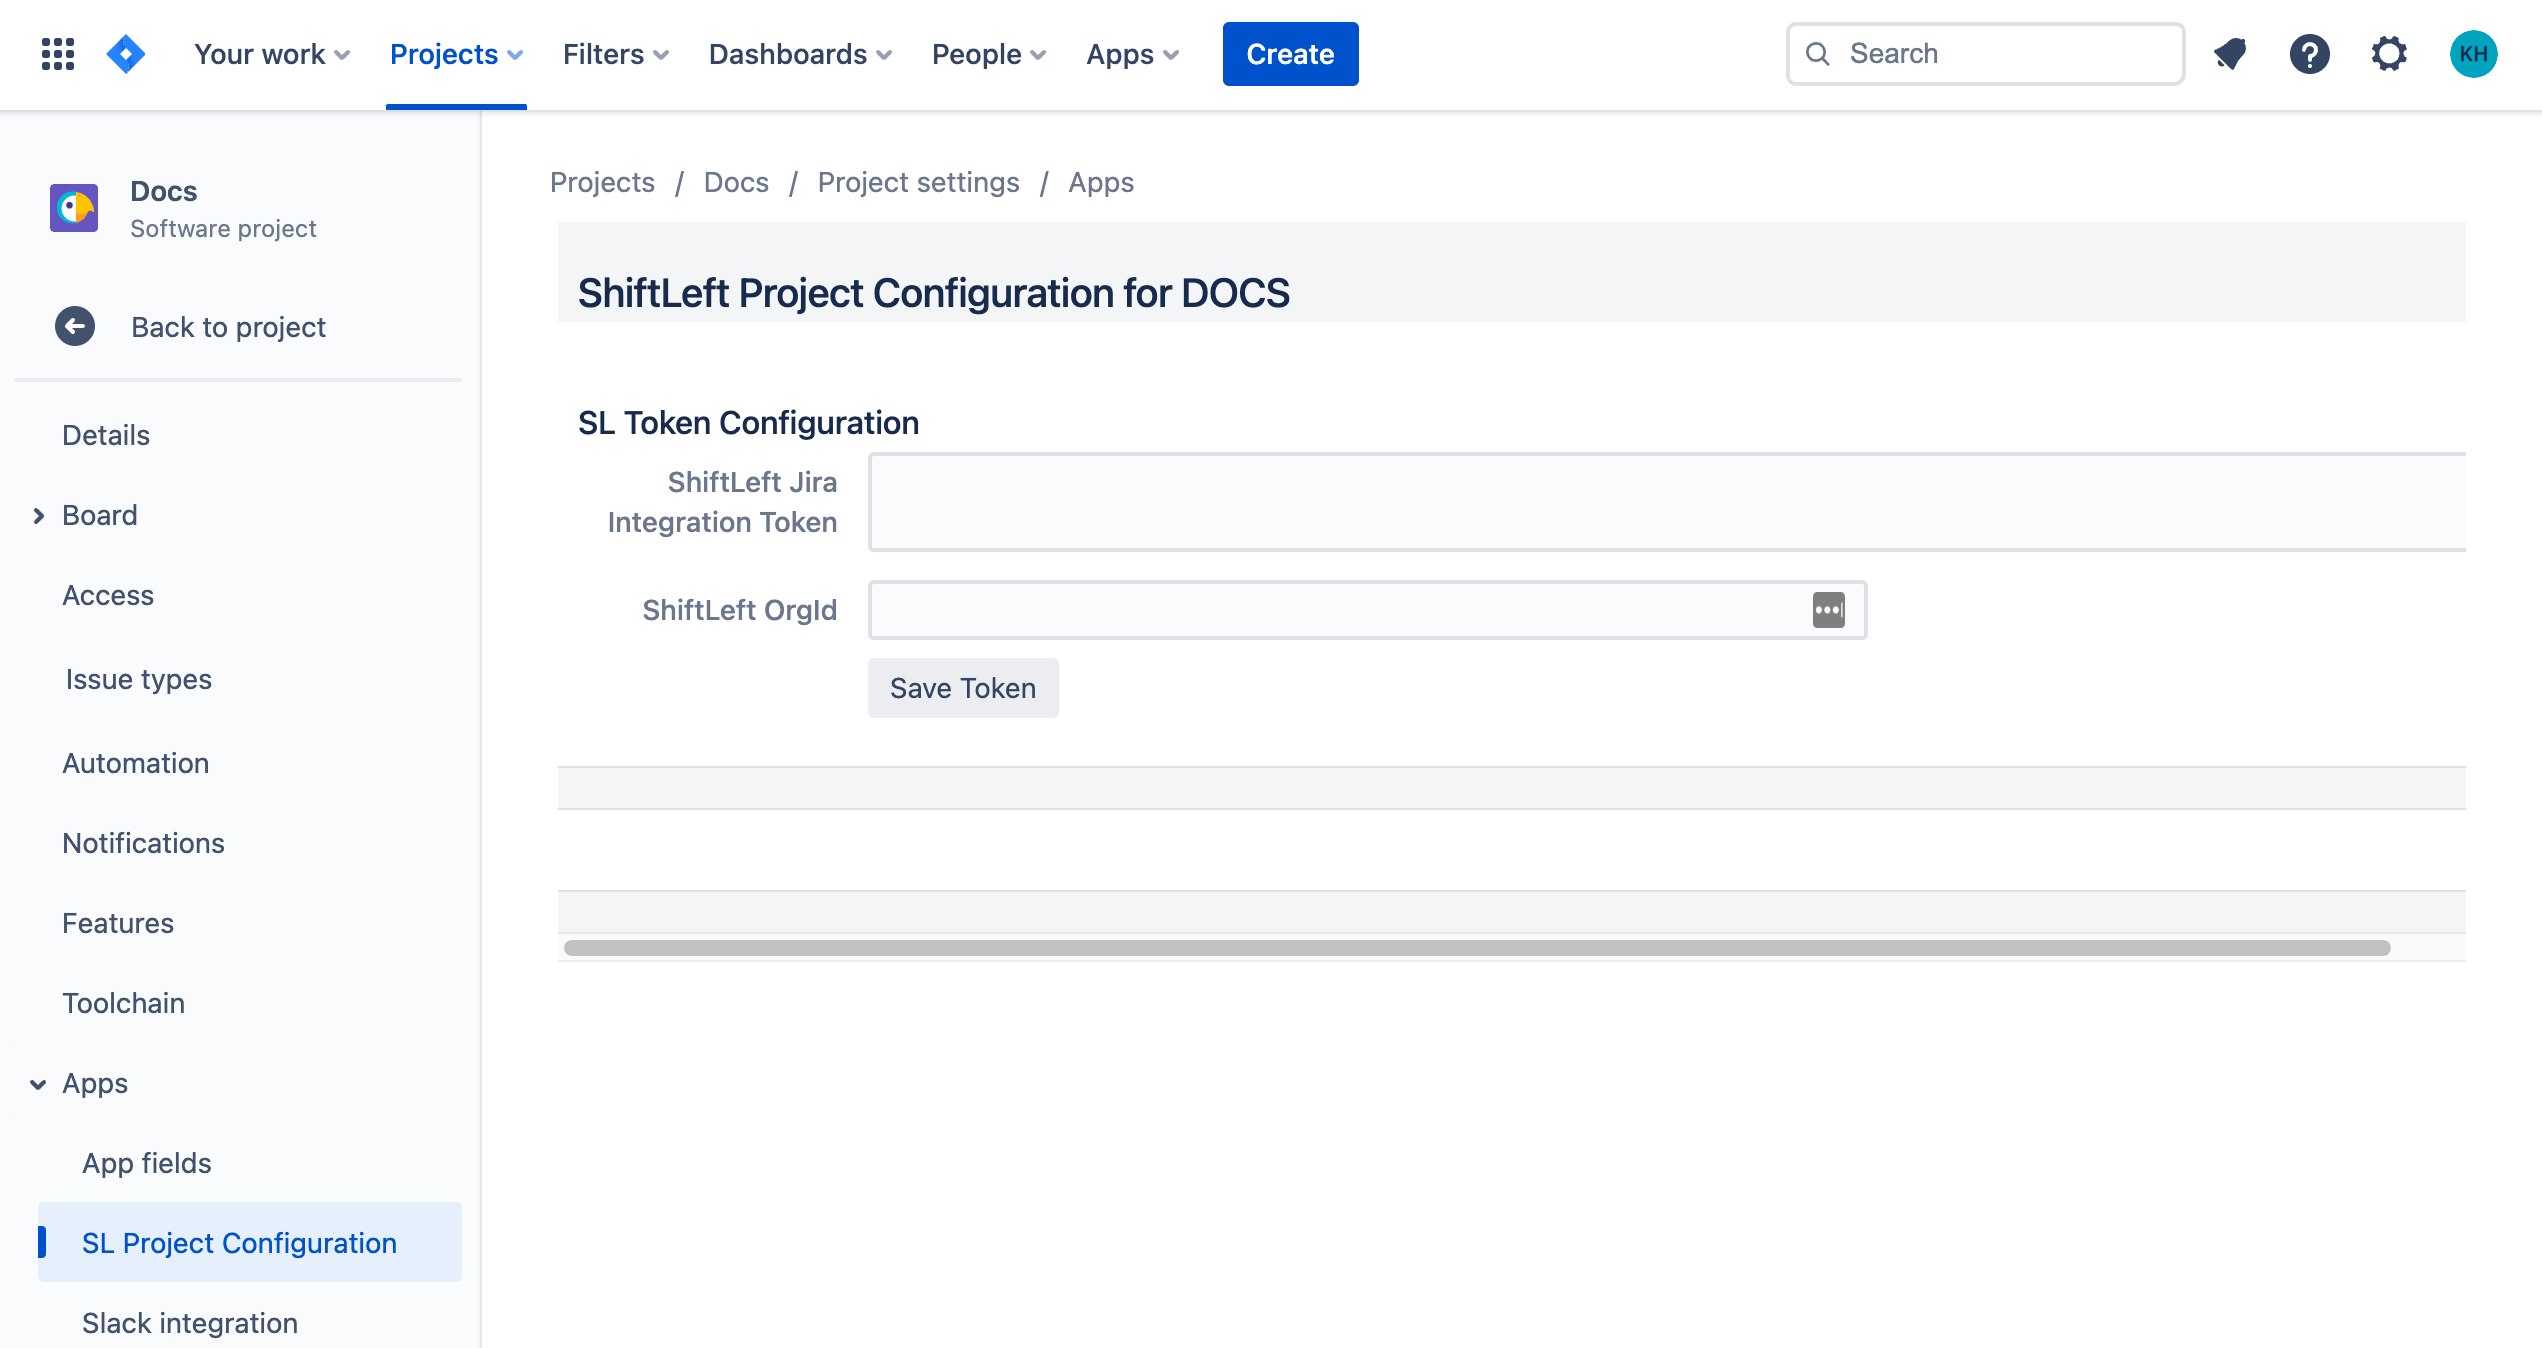
Step 4: Configure your plugin
-
In your project, go to Project Settings > Apps > SL Project Configuration.
-
Paste in your Qwiet Jira Integration Token and Qwiet OrgId values, and click Save Token.
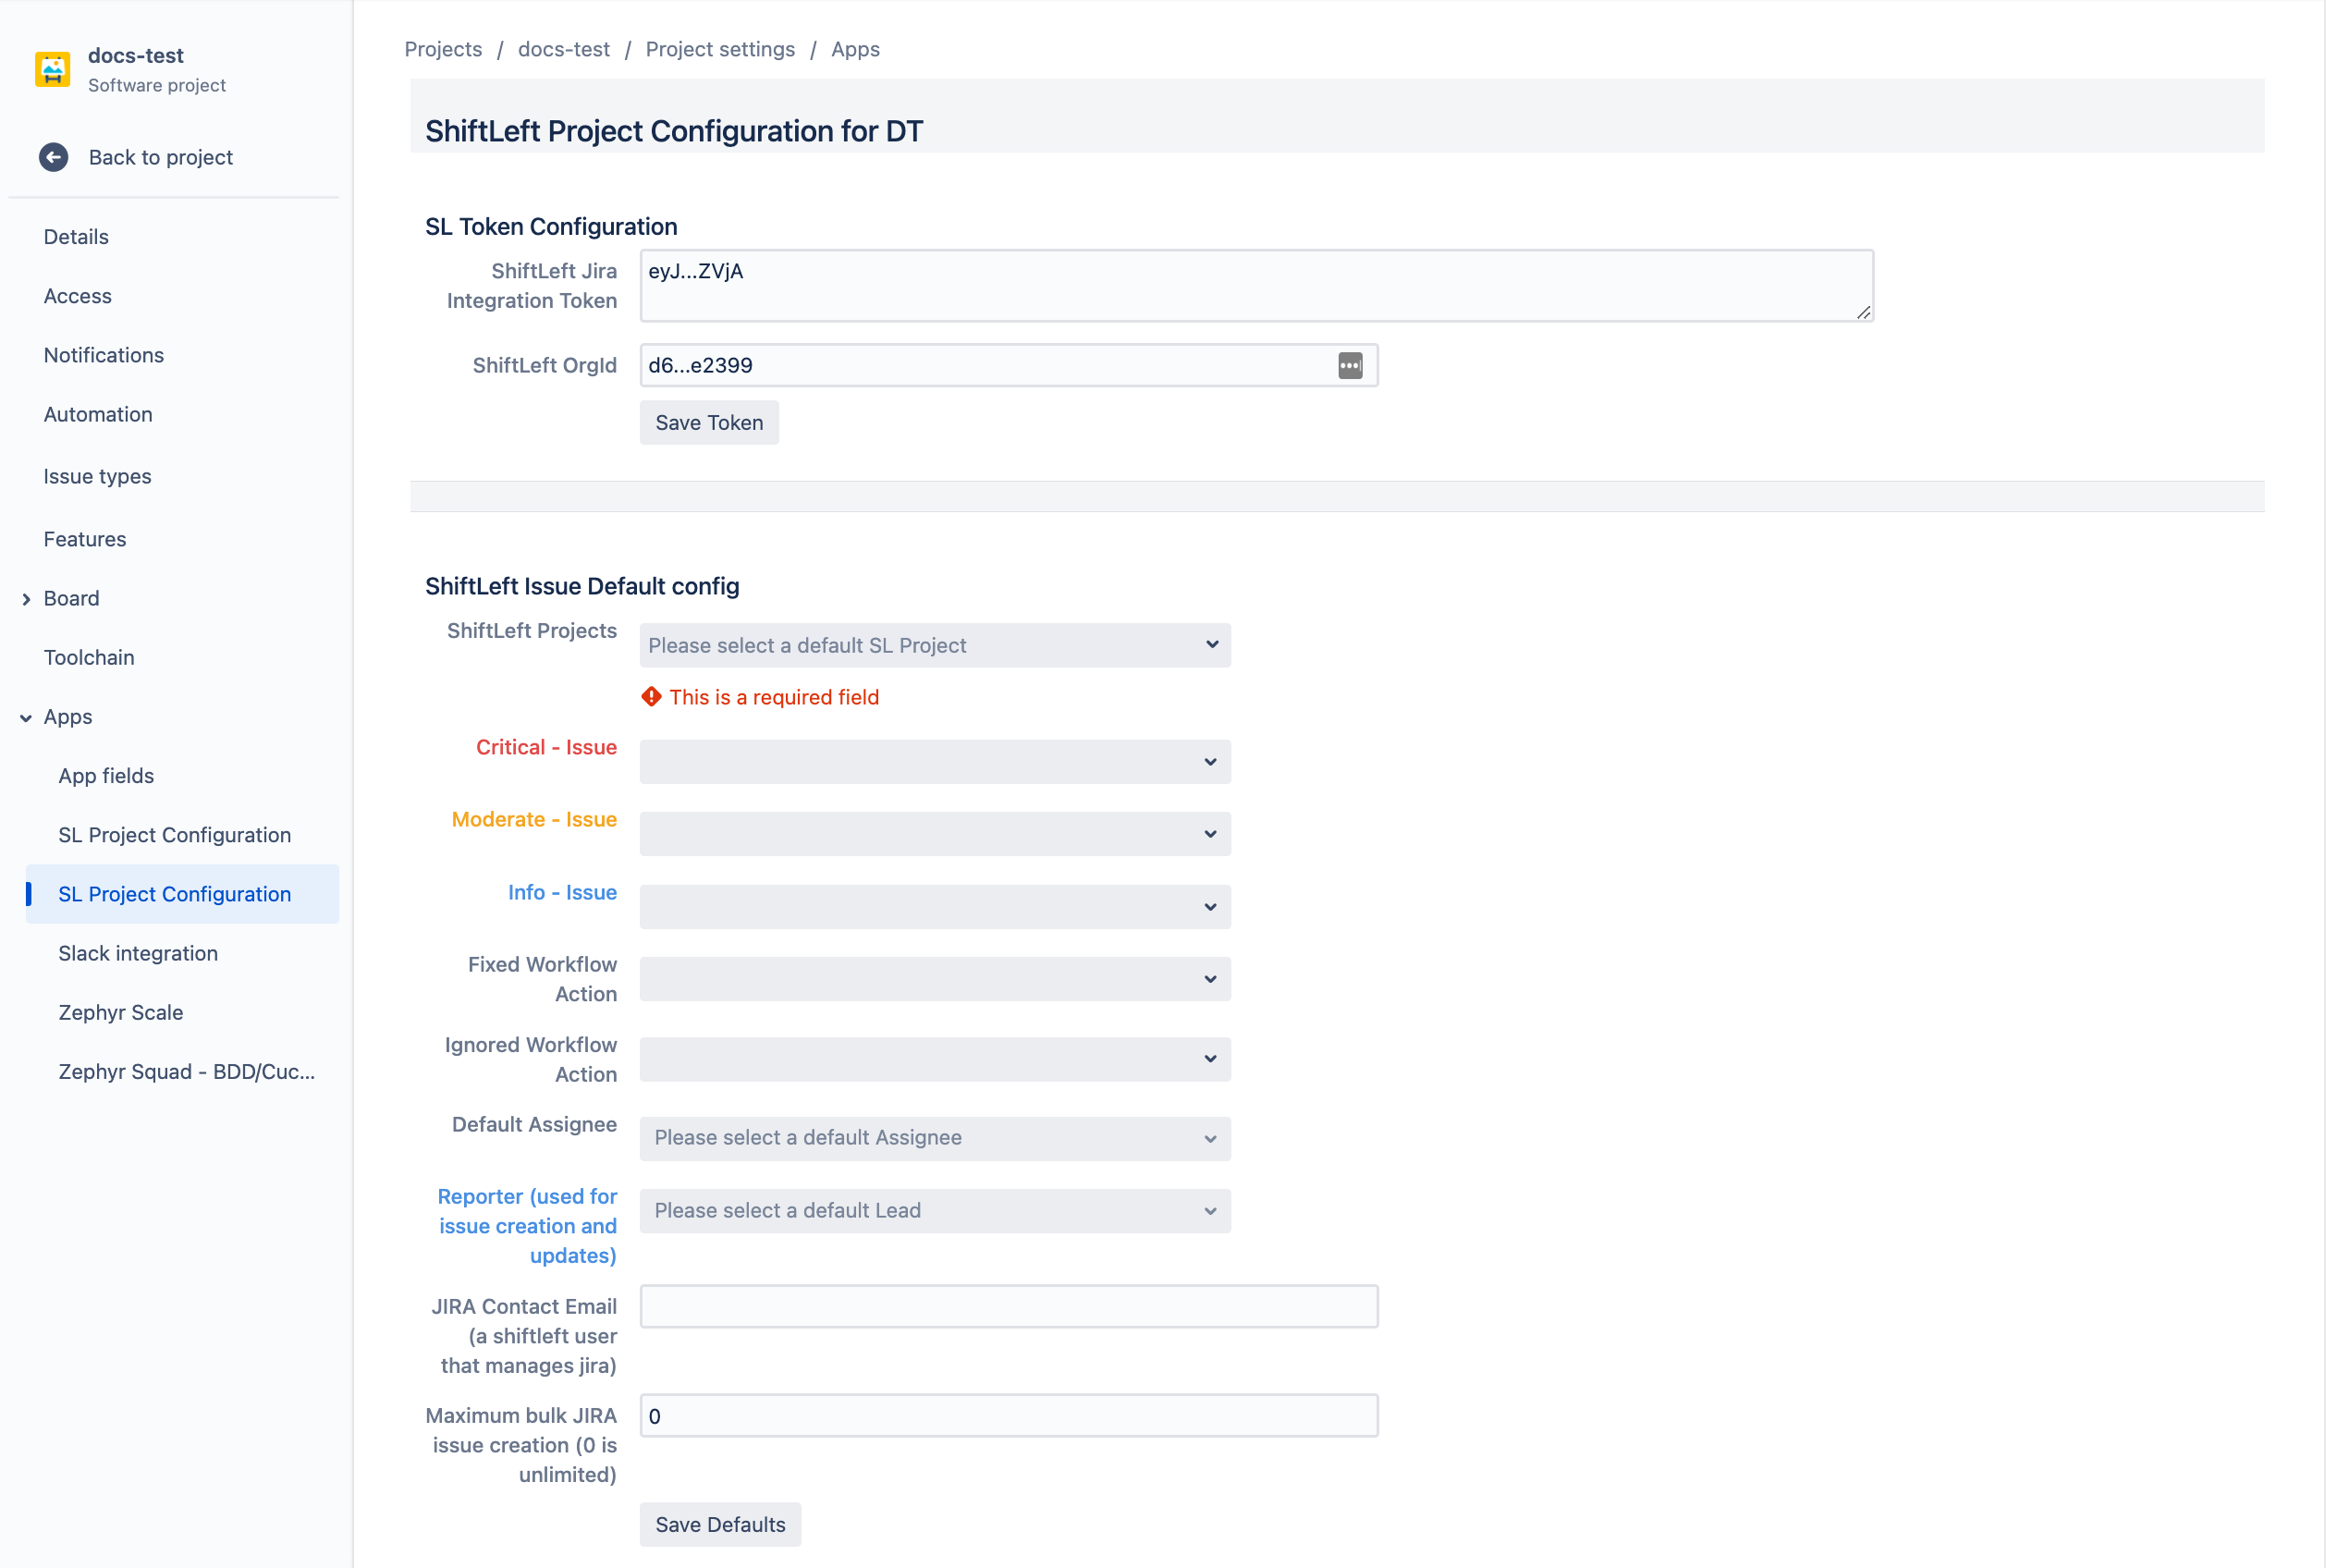
- Once you've successfully linked your plugin with your Qwiet account, you'll see a Qwiet Issue Default config section. This allows you to map Qwiet findings to Jira types.
-
For example, for each Critical finding that you send over, you might want it to create a Task. If you've marked something as Fixed, you might want it to show as Done in Jira.
-
The complete list of options available to you is as follows:
- Qwiet Projects: The specific projects in Qwiet whose identified vulnerabilities you want to be imported to Jira
- Critical - Issue: The Issue Type (e.g., task, sub-task, bug) you wish to be created for vulnerabilities that are flagged as critical in severity
- High - Issue: The Issue Type (e.g., task, sub-task, bug) you want to be created for vulnerabilities that are flagged as high severity
- Medium - Issue: The Issue Type (e.g., task, sub-task, bug) you want to be created for vulnerabilities that are flagged as medium in severity
- Low - Issue: The Issue Type (e.g., task, sub-task, bug) you want to be created for vulnerabilities that are flagged as low severity
- Fixed Workflow Action: The status you want to be assigned to the Jira issue for the vulnerability when you mark it as Fixed in the Qwiet Dashboard
- Ignored Workflow Action: The status you want to be assigned to the Jira issue for the vulnerability when you mark it as Ignored in the Qwiet Dashboard
- Default Assignee: The name to auto-assign to the newly-created issues
- Reporter: The name to attach to the issues as the reporter (we recommend creating a user specifically for this purpose so that you can quickly identify all issues created by the plugin)
- JIRA Contact Email (a Qwiet AI user that manages jira): The Qwiet user that's managing the Jira plugin
- Maximum bulk JIRA issue creation (0 is unlimited): The maximum number of Jira issues that a user can create at once (set to zero to make this value unlimited)
-
Make the changes you would like; click Save Defaults to persist your changes.
Step 5: Send issues to Jira
At this point, you can create Jira tasks for the findings identified in Qwiet.
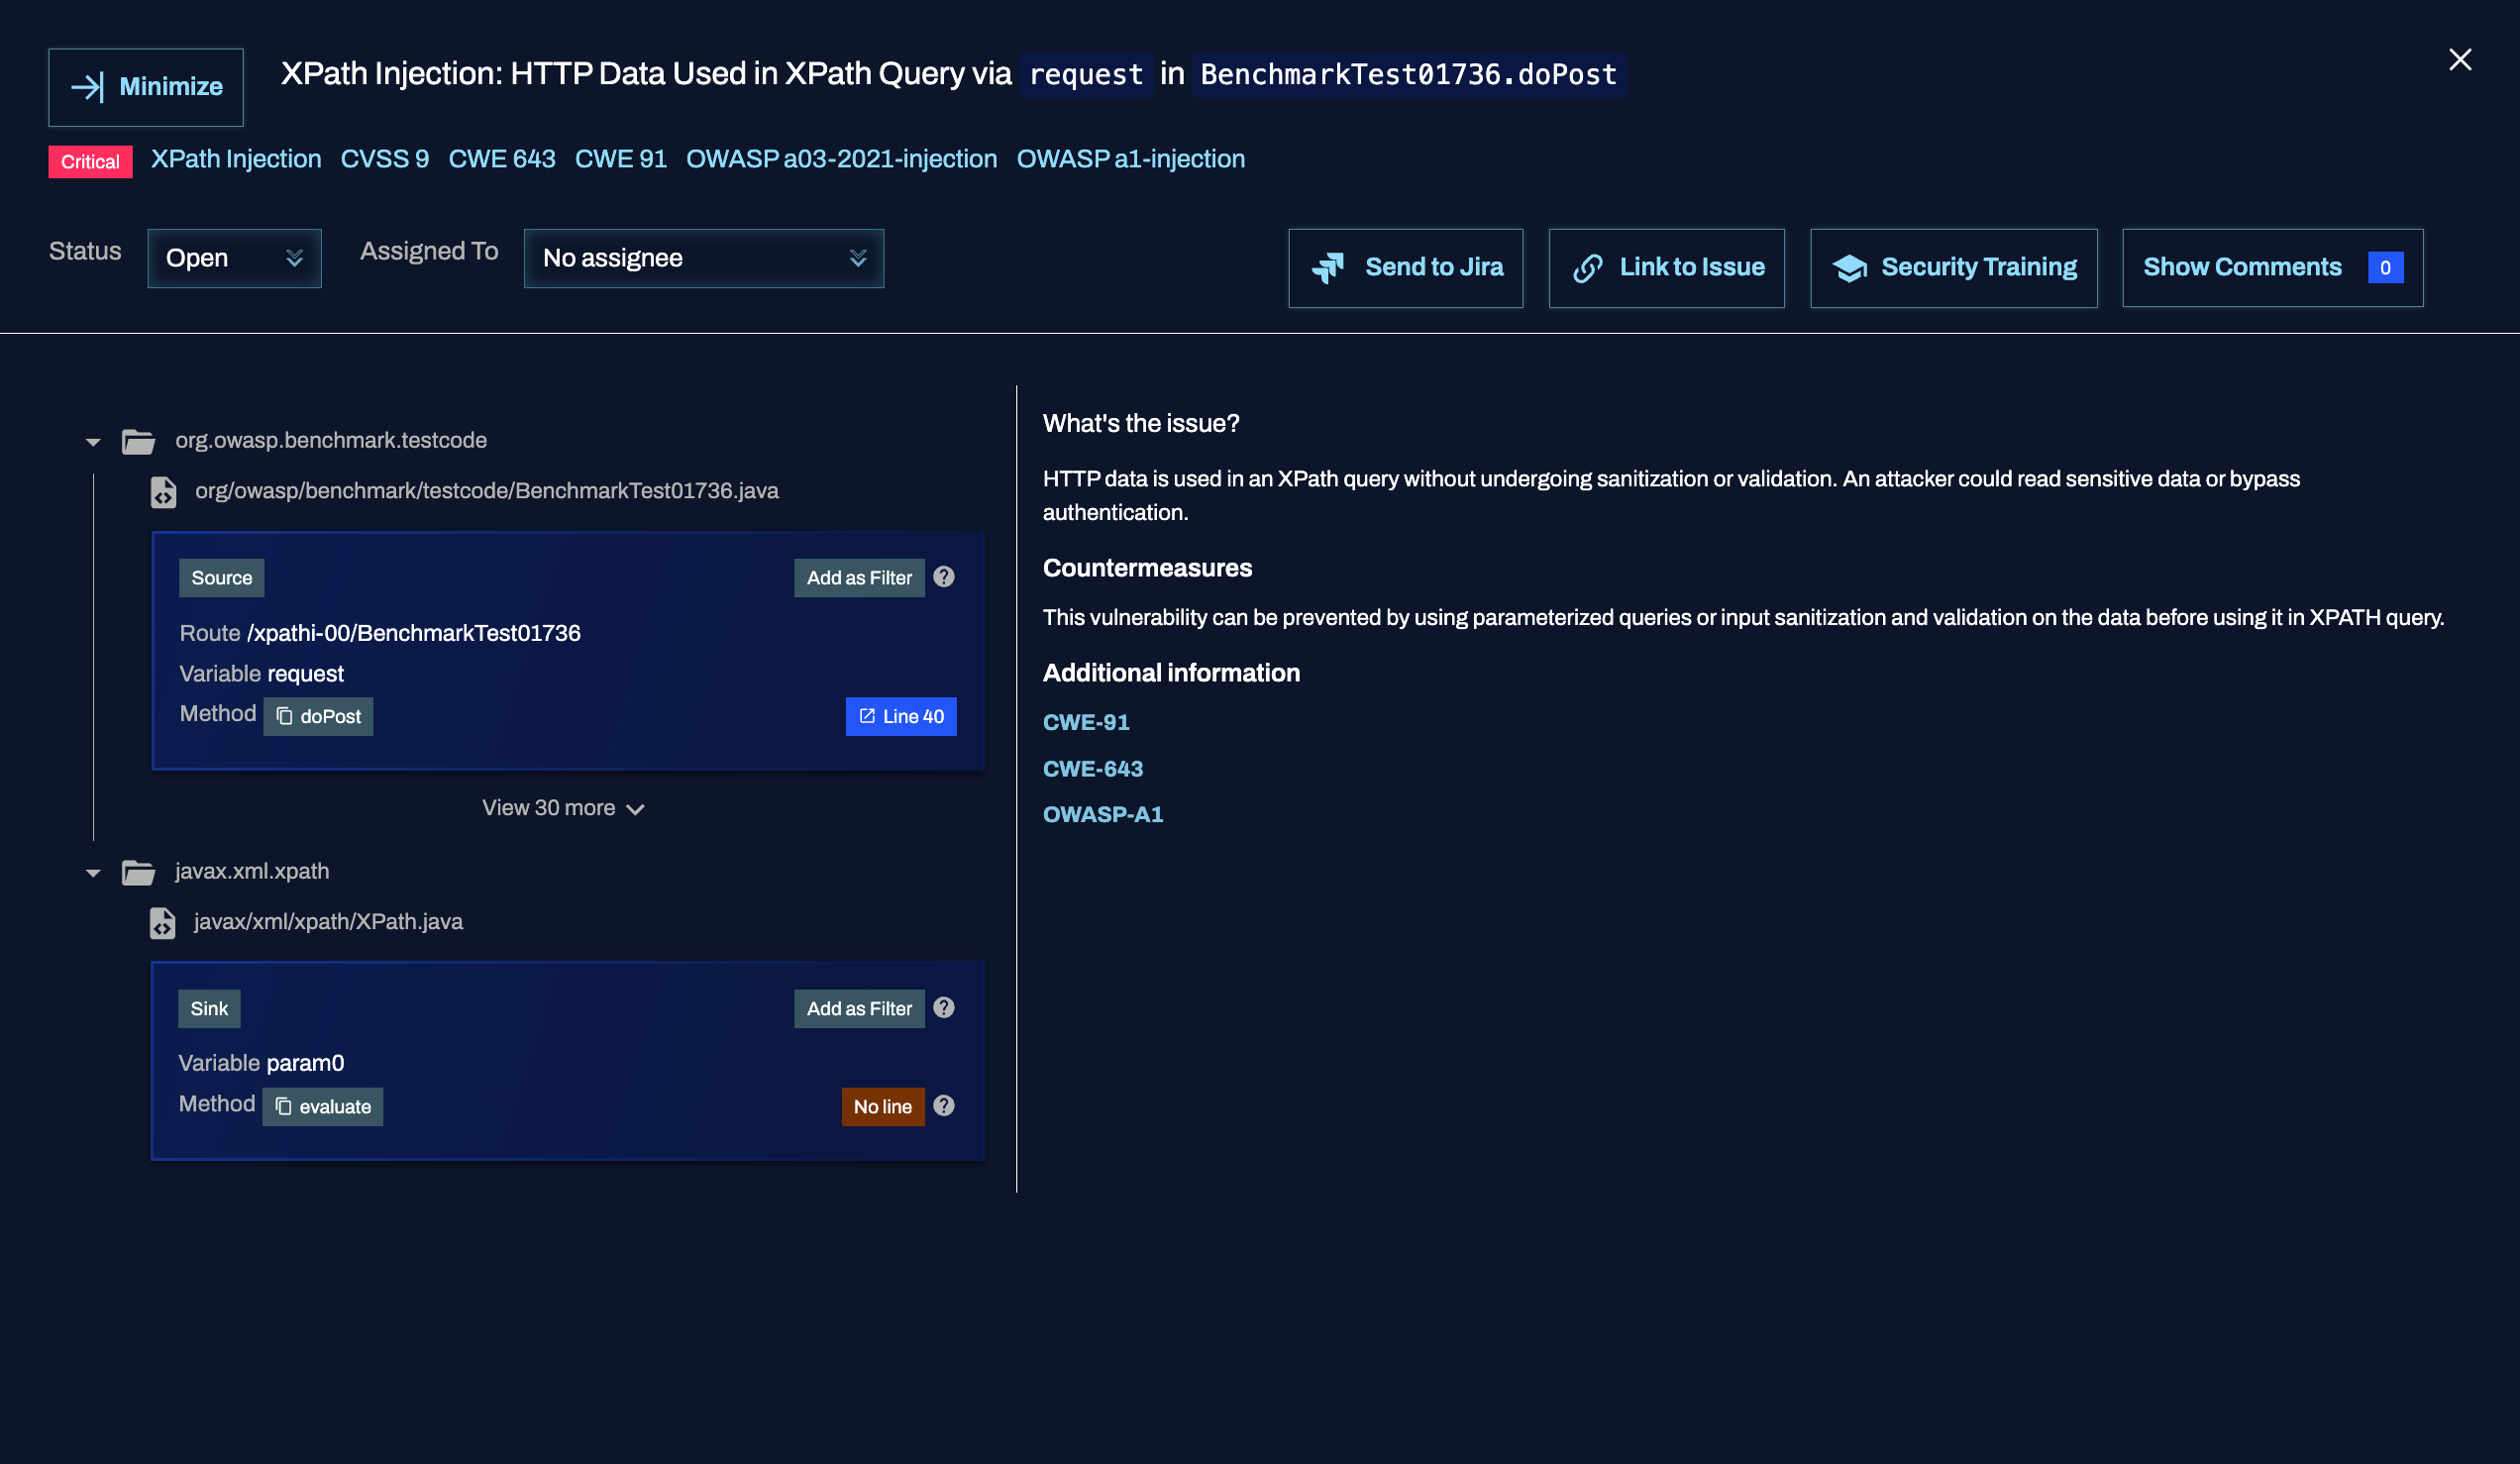
- Select a finding, expand its menu, and click Assign to Jira. Alternatively, you can click Details to launch its detailed view in the Dashboard.
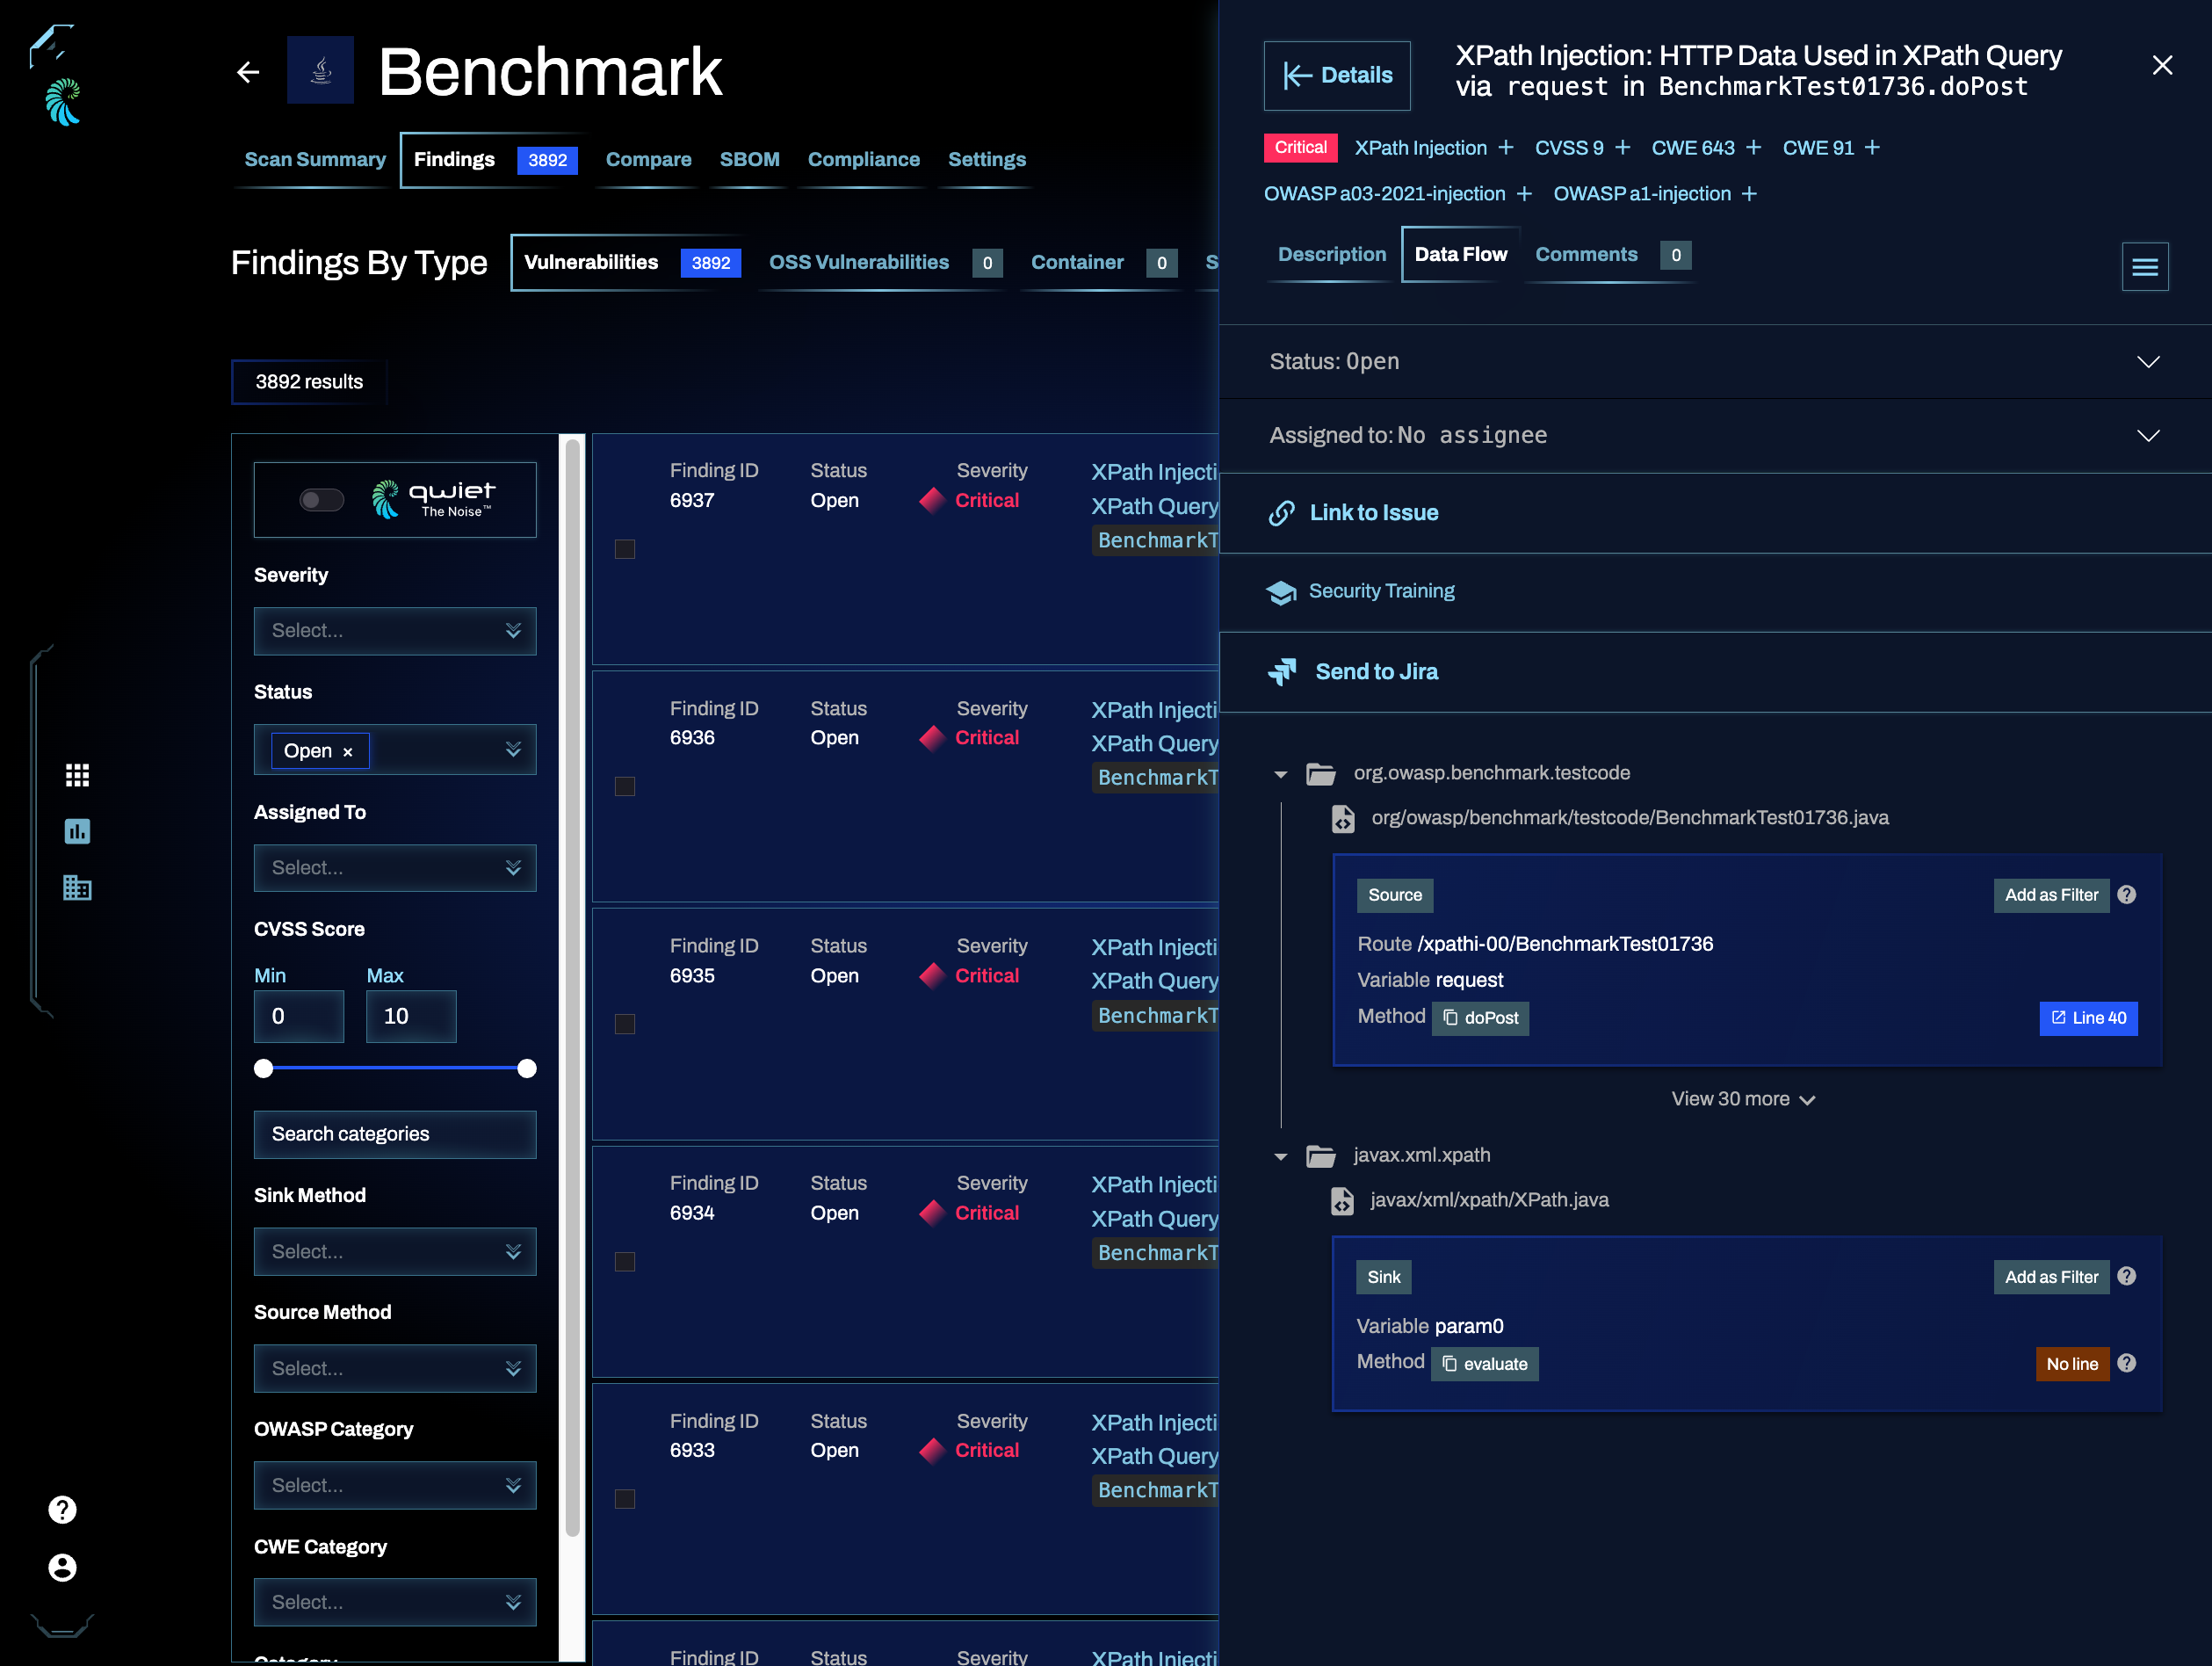
- Then, click Assign to Jira.
Step 6: Navigating between Jira and Qwiet
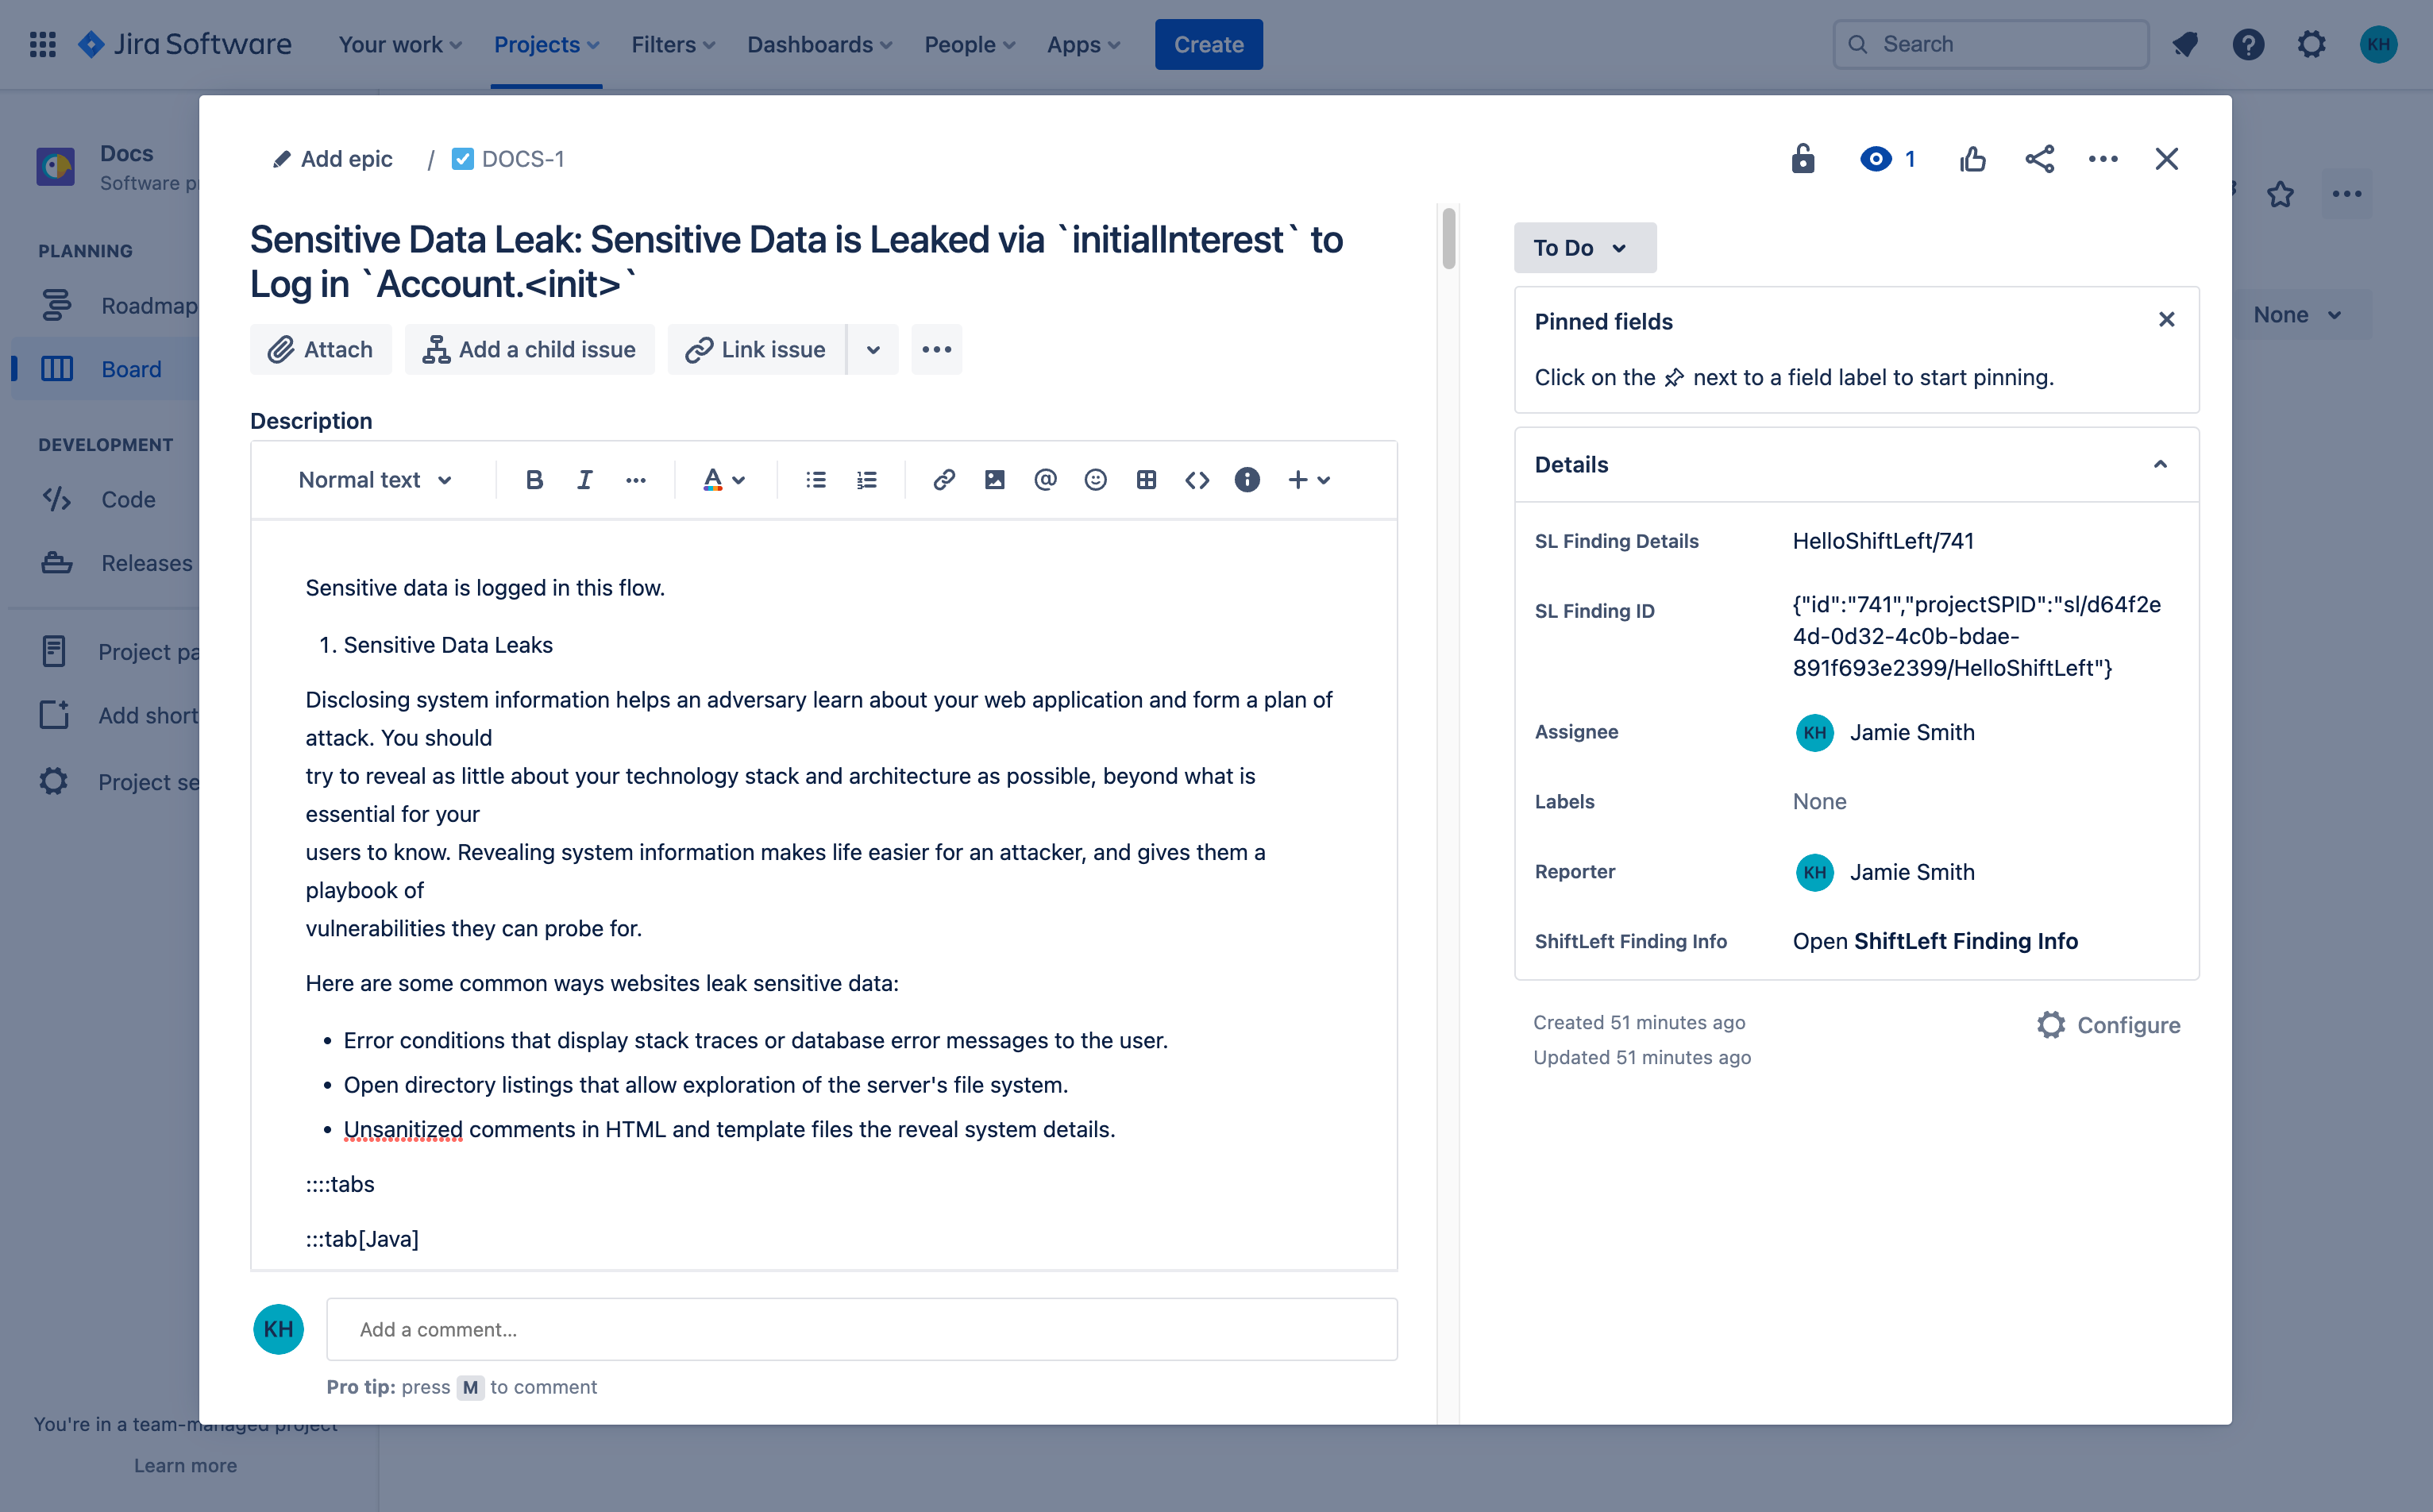
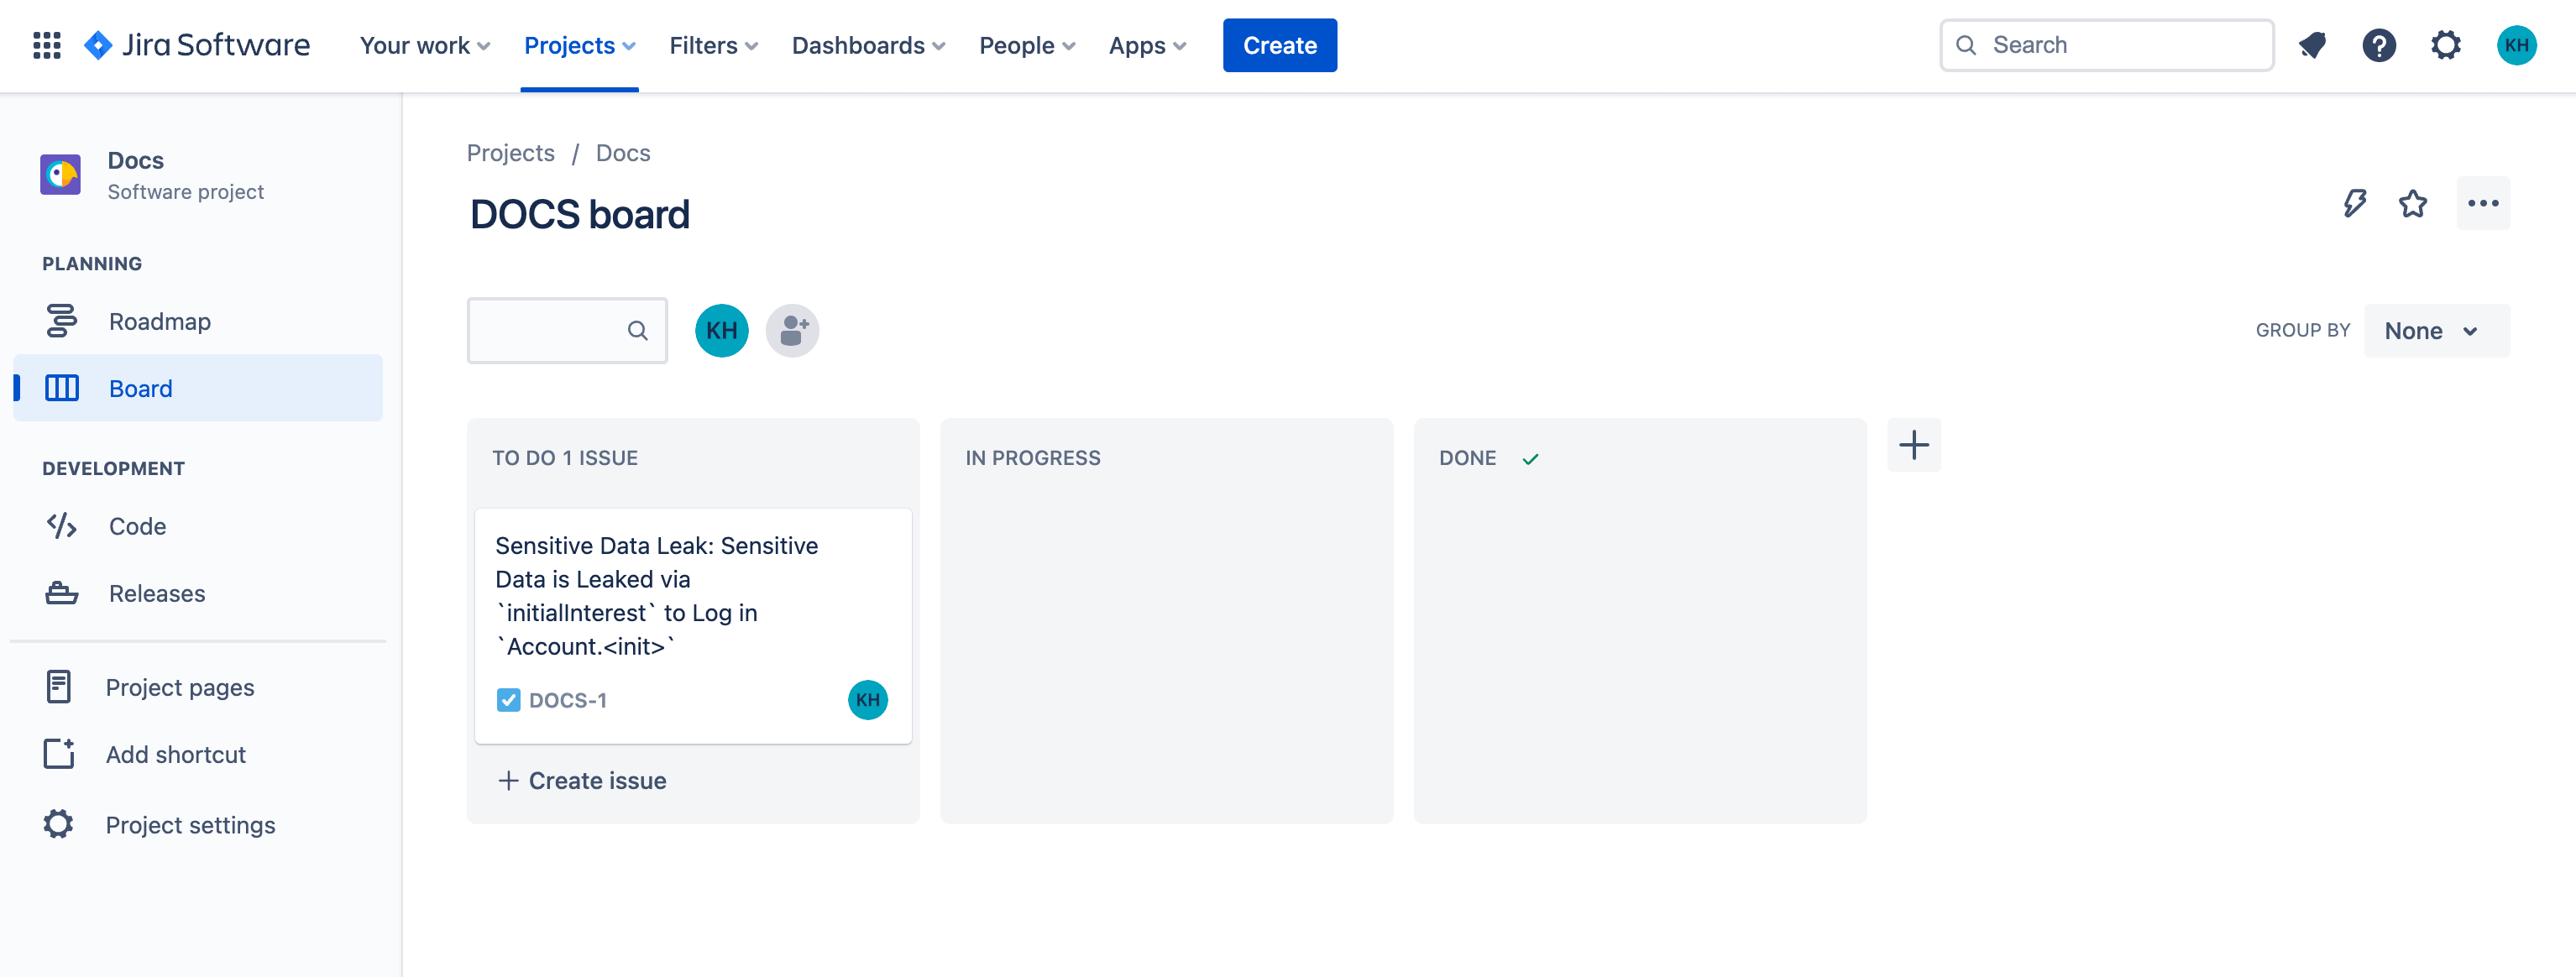
Once you've successfully created an issue, you'll see the newly created finding in Jira:
When you open the Jira ticket, you'll see that the description has been populated with the same information in Qwiet. You'll also see a link under Qwiet Finding Info that lets you return to the Qwiet Dashboard.