Integrate Qwiet AI by Harness into the GitHub pull request workflow
This article will show you how to integrate Qwiet AI by Harness into your GitHub Pull Request (PR) workflow for automated code analysis using GitHub Actions.
Prerequisites
This article assumes that you have an existing GitHub repository to which you would like to add Qwiet AI by Harness for automated code analysis.
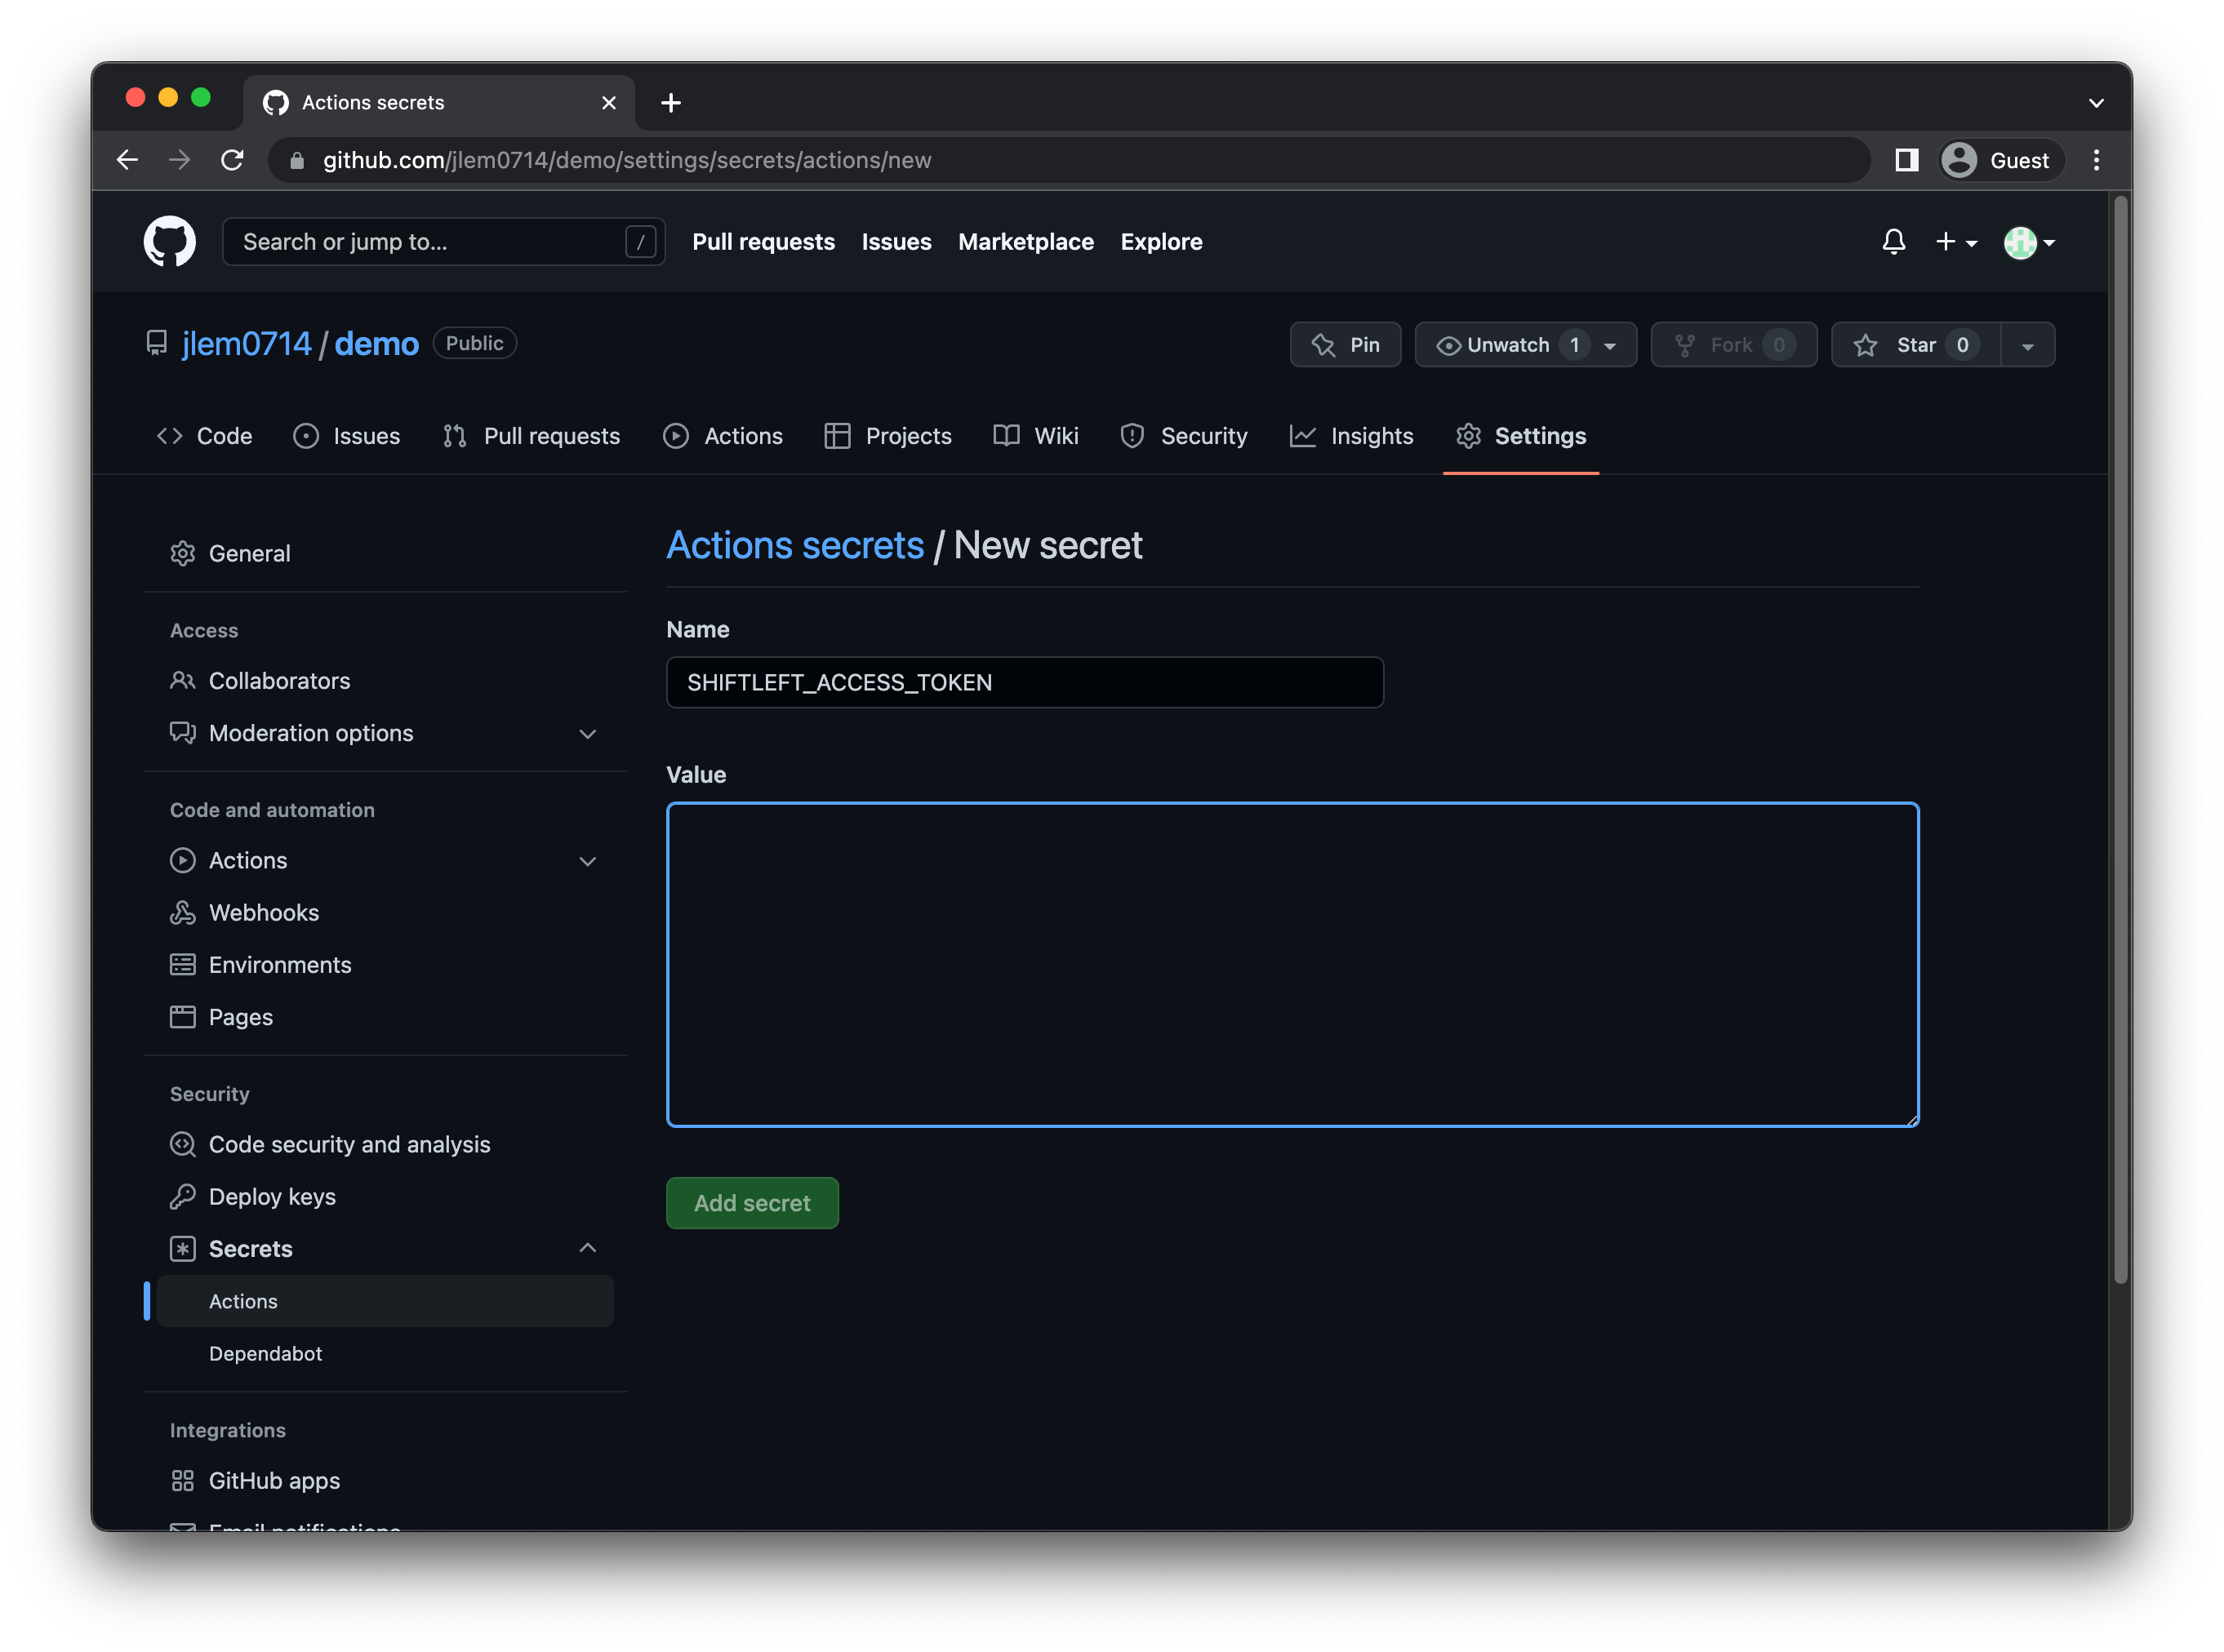
Step 1: Create your secrets
GitHub's secrets are encrypted environment variables that protect information while making them available for use in GitHub Actions workflows. They are specific to your GitHub repository.
To create secrets specific to your GitHub repository:
- Navigate to your GitHub repo.
- Go to Settings > Secrets > Actions.
- Click New repository secret.
- Create a secret named
SHIFTLEFT_ACCESS_TOKENand provide the value of your CI token.
If you add the Qwiet AI by Harness functionality to multiple repos, you may want to create encrypted secrets for an organization. This allows you to create secrets once for use across multiple repos.
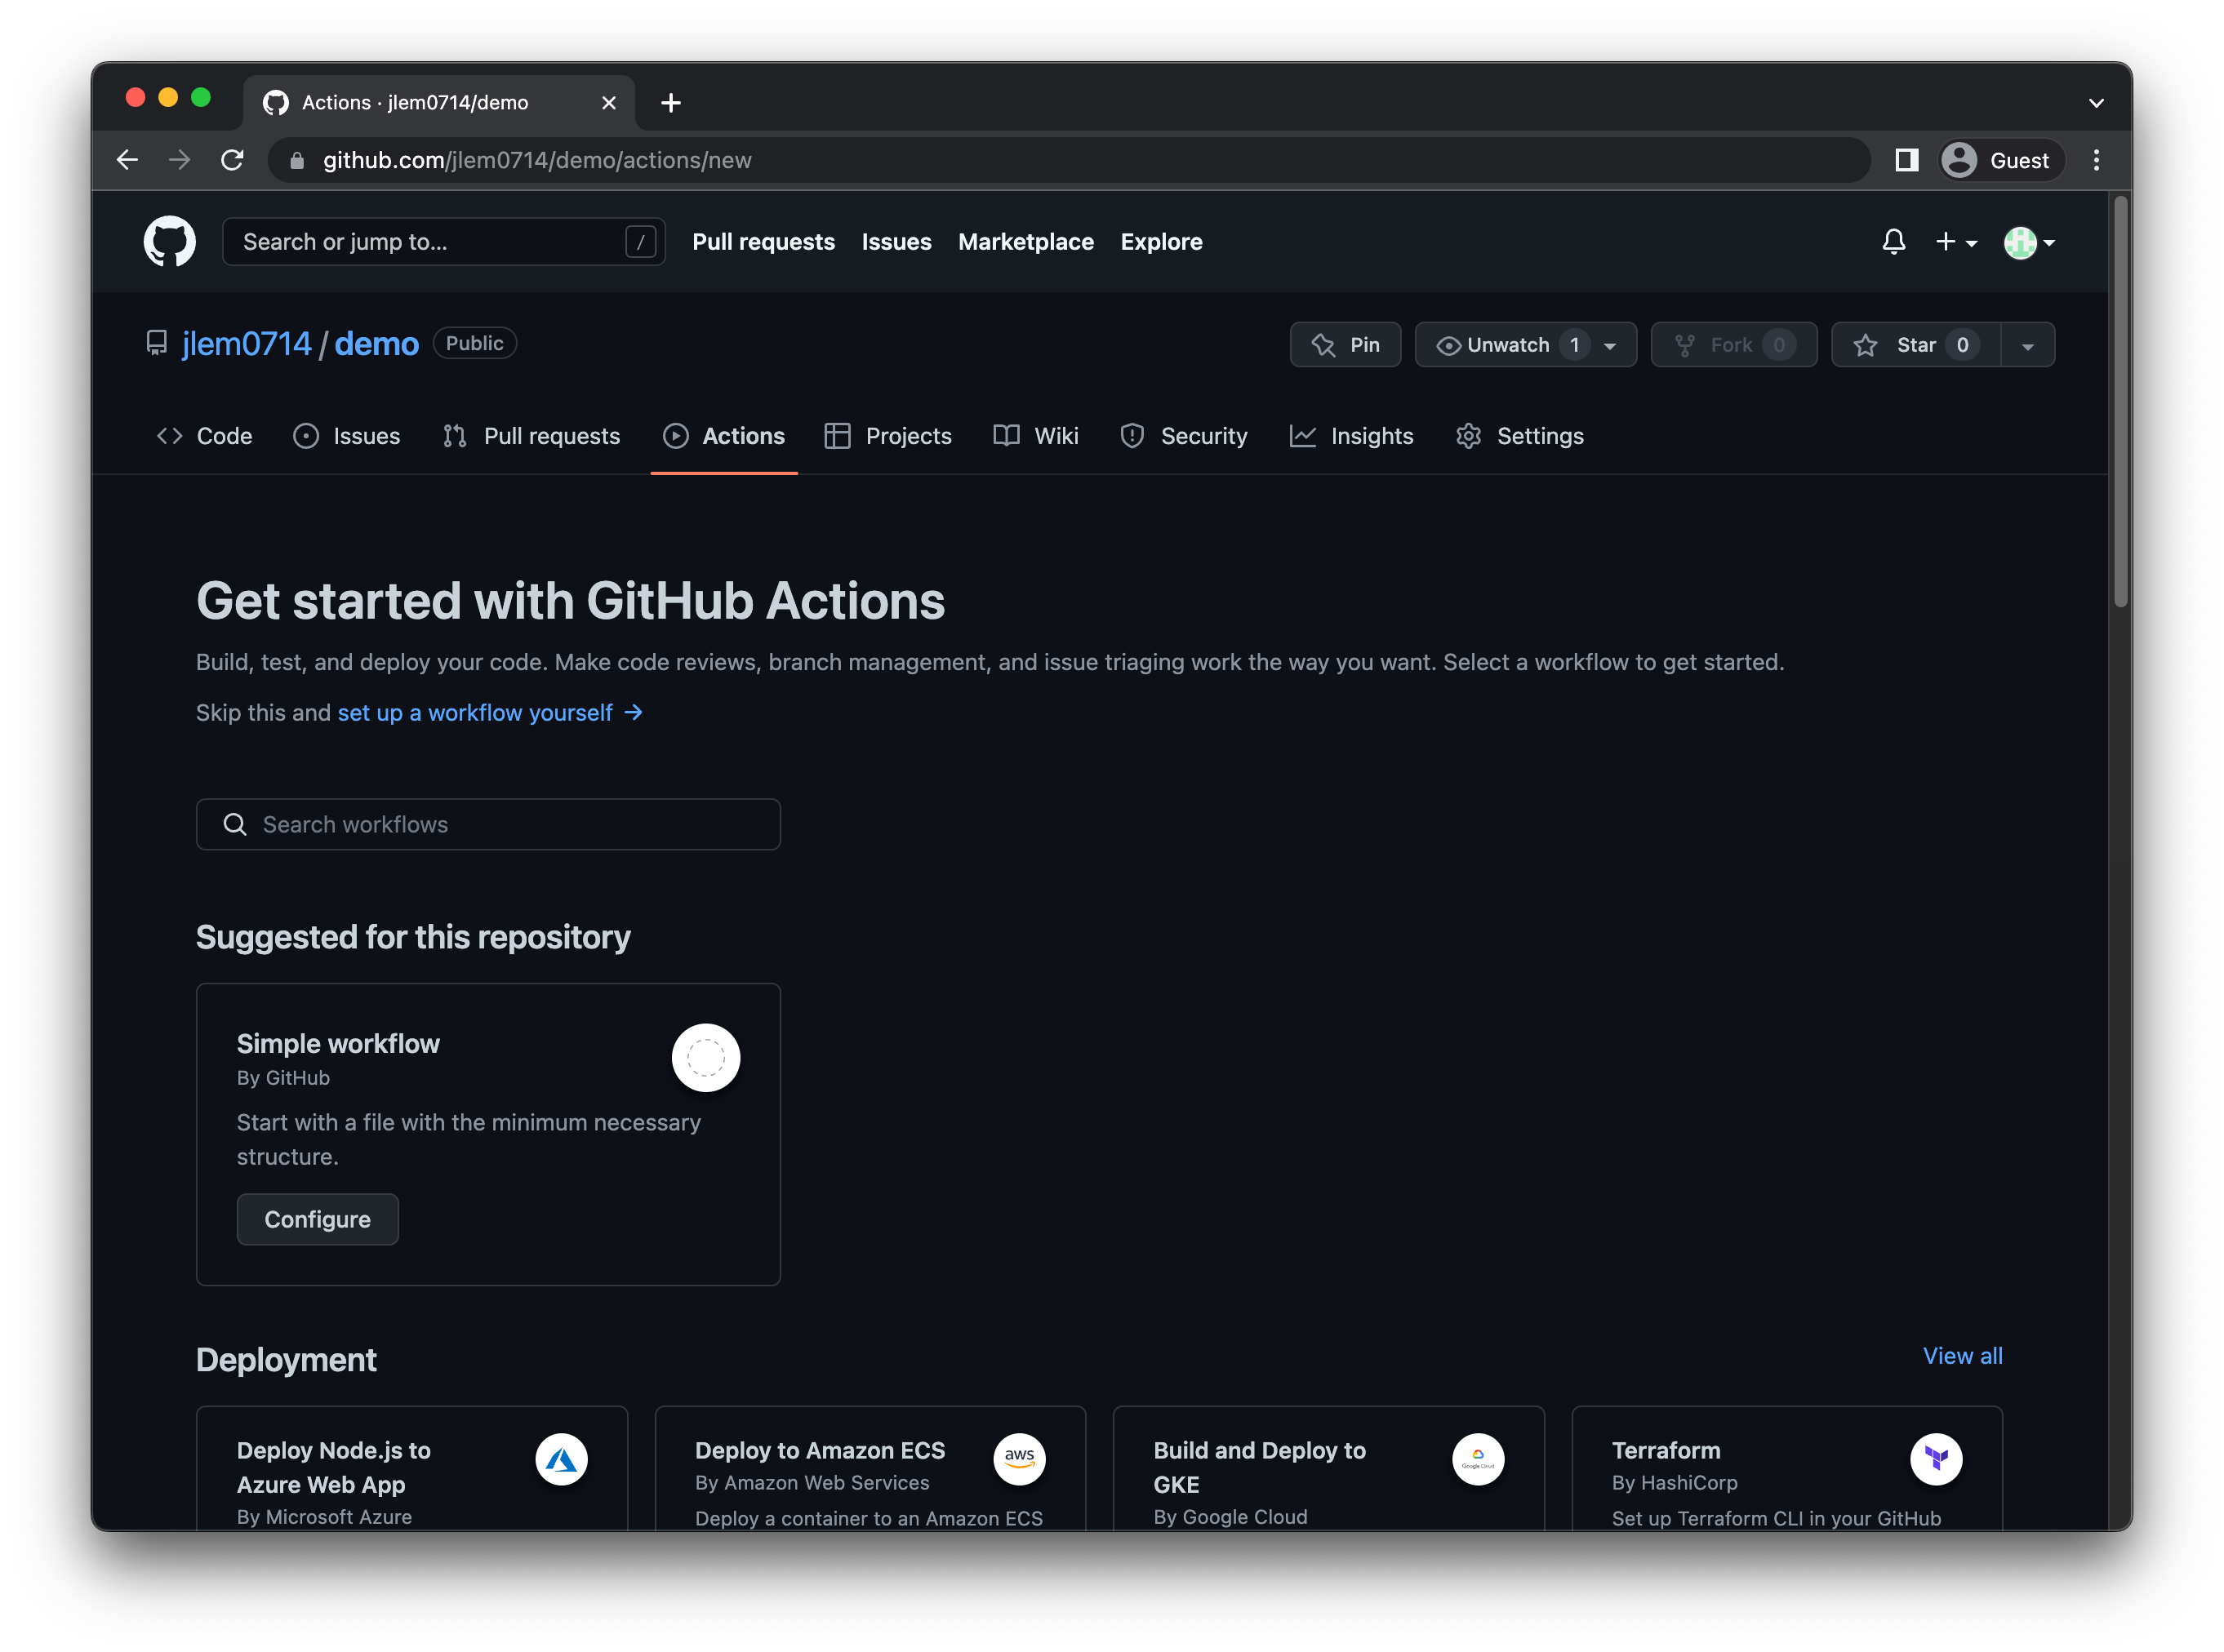
Step 2: Create your GitHub Action and define its workflow
GitHub Actions offers you workflow automation functionality. You can use this to automatically run Qwiet AI by Harness (e.g., when you create a new Pull Request).
To create a new GitHub Action for your repository, click Actions. If this is your first time setting up a GitHub Action, click set up a workflow yourself near the top-left; otherwise, click New workflow, then select set up a workflow yourself.
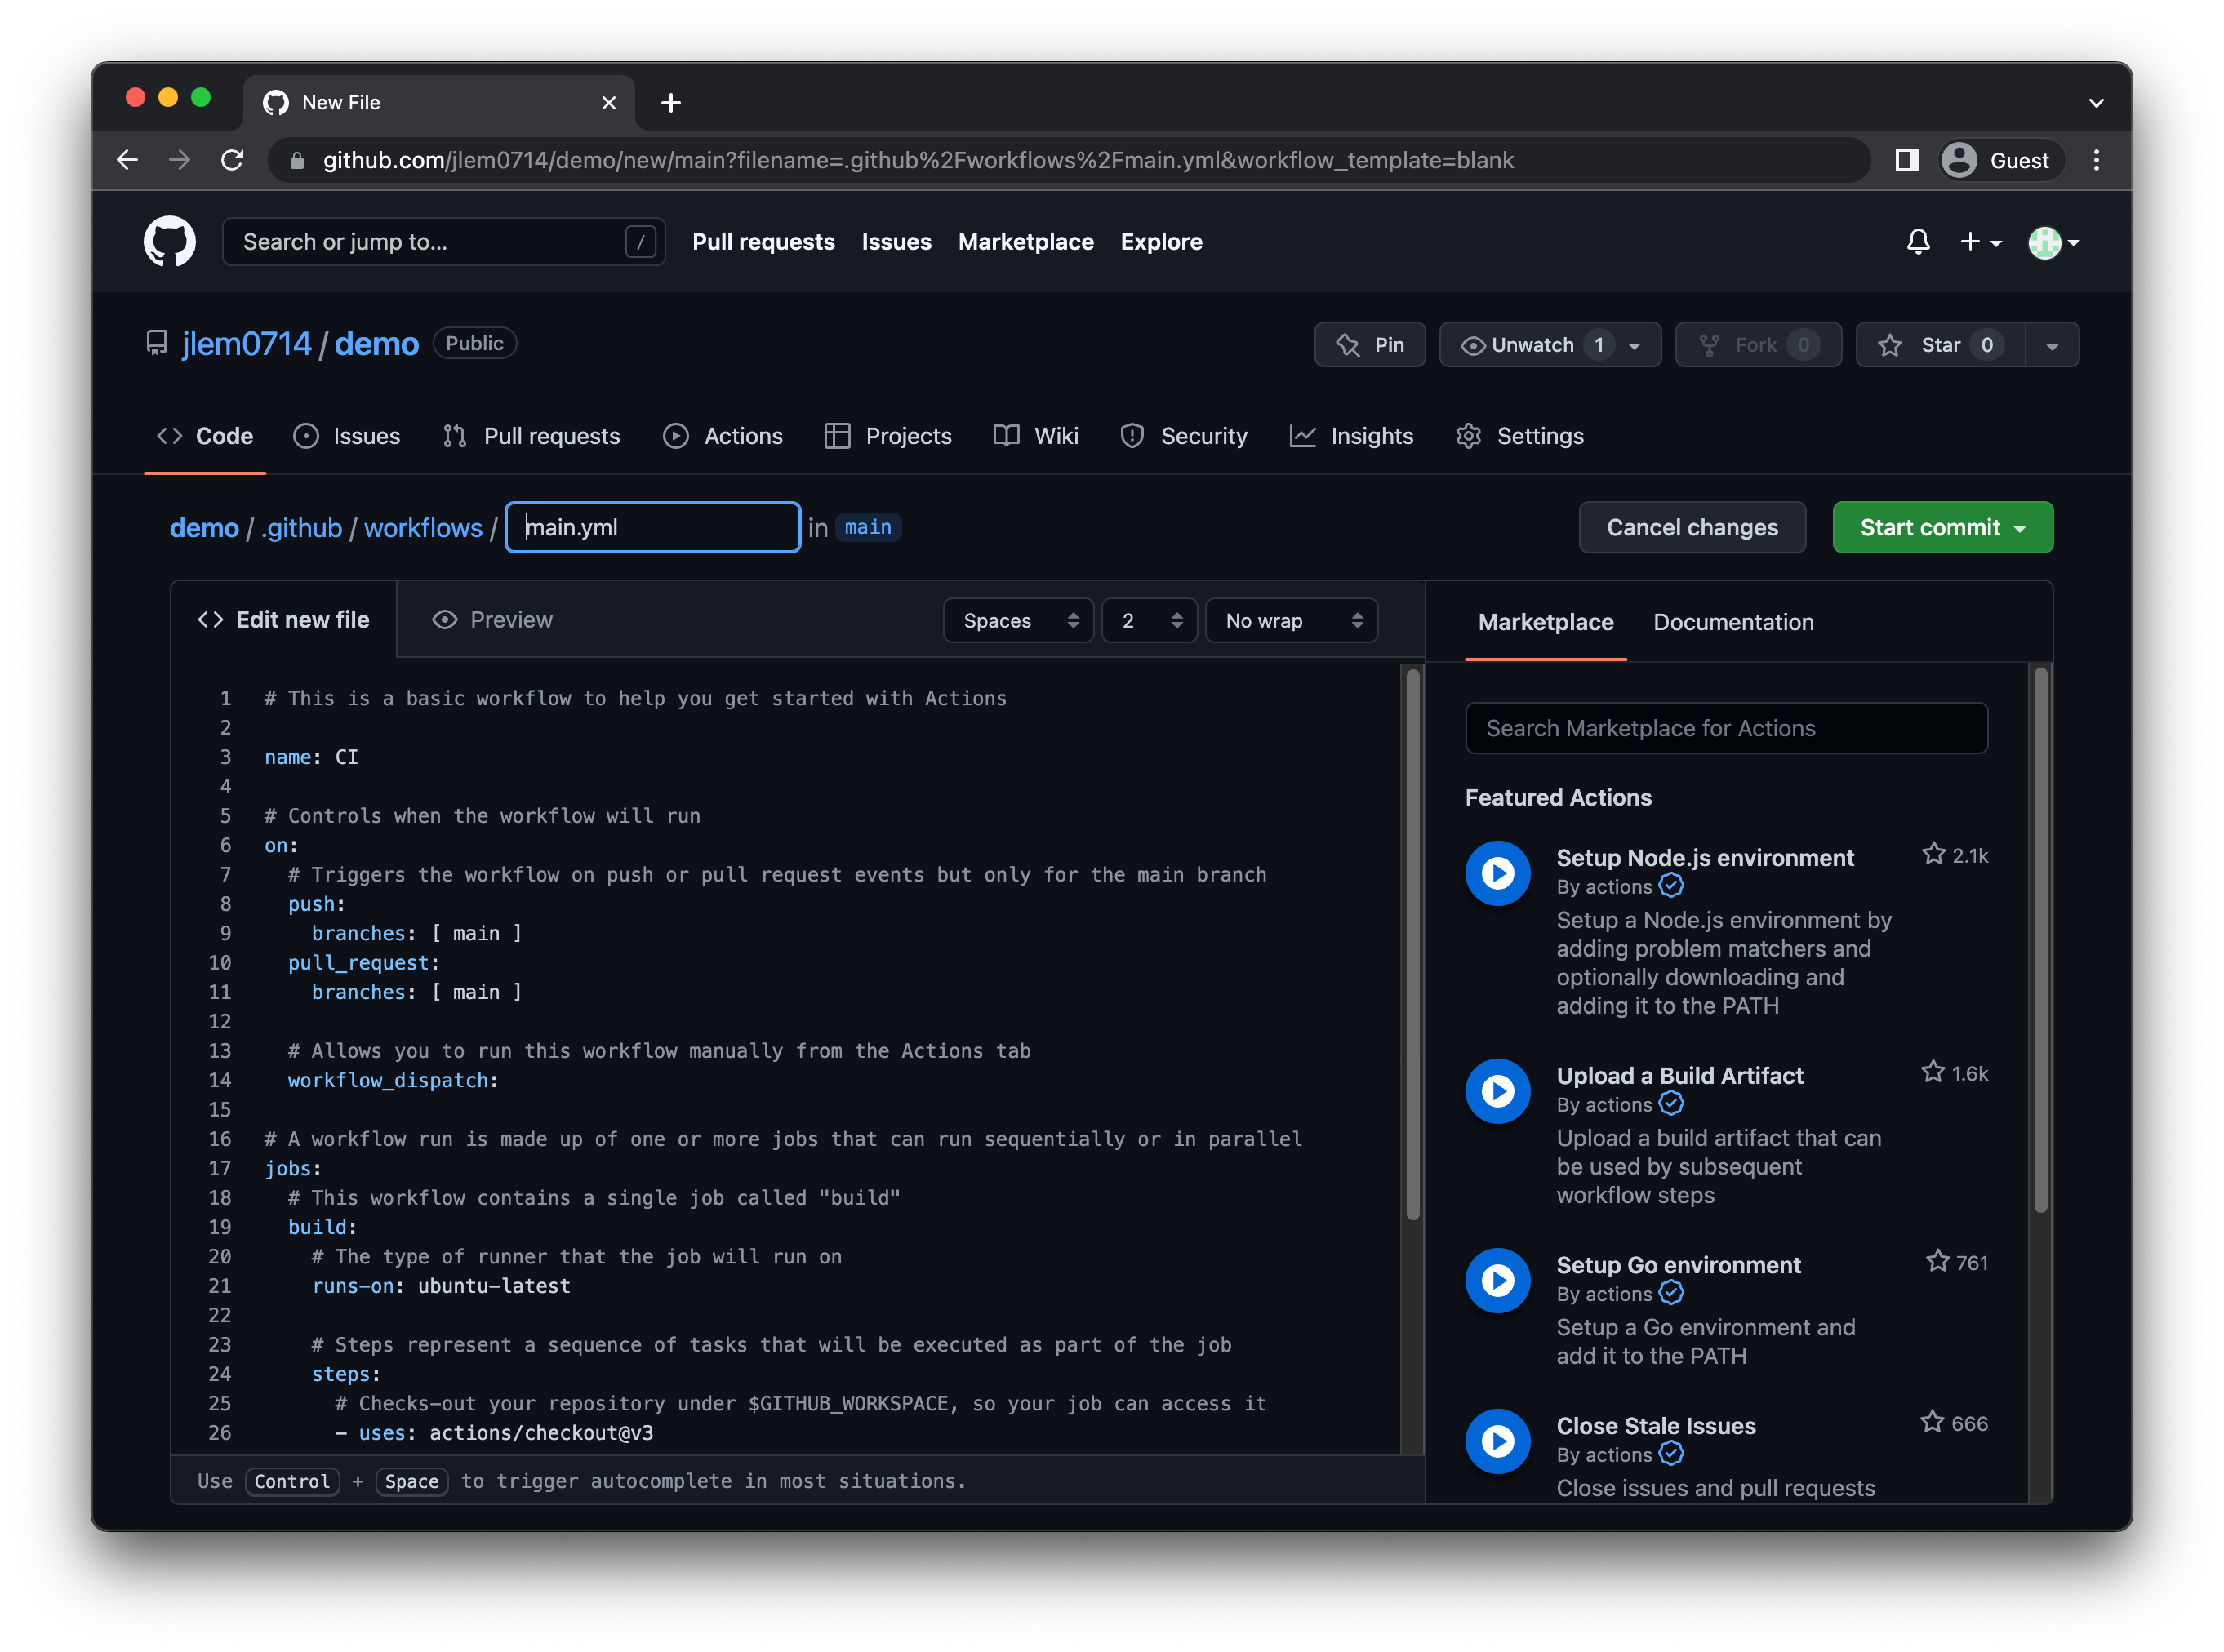
You will be redirected to a YAML editing window. Rename the file (if desired), and provide the following script to invoke Qwiet AI by Harness.
- C#
- Go
- Java
- JavaScript
- Kotlin
- Python
- Terraform
# This workflow integrates Qwiet AI by Harness with GitHub
# Visit https://docs.shiftleft.io for help
name: Qwiet

on:
  pull_request:
  workflow_dispatch:
  push:
    # We recommend triggering a scan when merging to your default branch
    # as a best practice, especially if you'd like to compare the results
    # of two scans (e.g., a feature branch against the default branch)
    branches:
      - main
      - master

jobs:
  NextGen-Static-Analysis:
    runs-on: windows-latest

    steps:
    - uses: actions/checkout@v2
    - name: Set up .NET
      uses: actions/setup-dotnet@v1
      with:
        dotnet-version: 5.0.x
    - name: Download Qwiet CLI
      run: |
        Invoke-WebRequest -Uri 'https://cdn.shiftleft.io/download/sl-latest-windows-x64.zip' -OutFile sl.zip
        Expand-Archive -Path sl.zip -DestinationPath . -Force
    - name: Build web API
      run: dotnet build netcoreWebapi
    - name: Extract branch name
      shell: bash
      run: echo "##[set-output name=branch;]$(echo ${GITHUB_REF#refs/heads/})"
      id: extract_branch
    - name: Analyze with NextGen Static Analysis
      run: .\sl analyze --strict --app shiftleft-csharp-demo --tag branch=${{ github.head_ref || steps.extract_branch.outputs.branch }} --csharp --dotnet netcoreWebapi/netcoreWebapi.csproj
      env:
        SHIFTLEFT_ACCESS_TOKEN: ${{ secrets.SHIFTLEFT_ACCESS_TOKEN }}
# This workflow integrates Qwiet AI by Harness with GitHub
# Visit https://docs.shiftleft.io for help
name: Qwiet

on:
  pull_request:
  workflow_dispatch:
  push:
    # We recommend triggering a scan when merging to your default branch
    # as a best practice, especially if you'd like to compare the results
    # of two scans (e.g., a feature branch against the default branch)
    branches:
      - main
      - master
jobs:
  ngsast-build:
    runs-on: ubuntu-latest
    steps:
    - uses: actions/checkout@v2
    - uses: actions/setup-go@v2
      with:
        go-version: '1.17'
    - name: Build
      run: |
        go build ./...
    - name: Download the Qwiet CLI and set permissions
      run: |
        curl https://cdn.shiftleft.io/download/sl > ${GITHUB_WORKSPACE}/sl && chmod a+rx ${GITHUB_WORKSPACE}/sl

    # Qwiet requires Java 1.8
    - name: Set up Java
      uses: actions/setup-java@v1.4.3
      with:
        java-version: 1.8

    - name: Analyze application with Qwiet
      run: ${GITHUB_WORKSPACE}/sl analyze --app ShiftLeftGo --tag branch=${{ github.head_ref || steps.extract_branch.outputs.branch }} --go $(pwd)
      env:
        SHIFTLEFT_ACCESS_TOKEN: ${{ secrets.SHIFTLEFT_ACCESS_TOKEN }}
# This workflow integrates Qwiet AI by Harness with GitHub
# Visit https://docs.shiftleft.io for help
name: Qwiet

on:
  pull_request:
  workflow_dispatch:
  push:
    # We recommend triggering a scan when merging to your default branch
    # as a best practice, especially if you'd like to compare the results
    # of two scans (e.g., a feature branch against the default branch)
    branches:
      - main
      - master
jobs:
  ngsast-build:
    runs-on: ubuntu-latest
    steps:
    - uses: actions/checkout@v2

    - name: Download the Qwiet CLI and set permissions
      run: |
        curl https://cdn.shiftleft.io/download/sl > ${GITHUB_WORKSPACE}/sl && chmod a+rx ${GITHUB_WORKSPACE}/sl

    # Qwiet requires Java 1.8
    - name: Set up Java
      uses: actions/setup-java@v1.4.3
      with:
        java-version: 1.8

    - name: Package with Maven
      run: mvn clean package

    - name: NextGen Static Analysis
      run: ${GITHUB_WORKSPACE}/sl analyze --app ShiftLeftJava --tag branch=${{ github.head_ref || steps.extract_branch.outputs.branch }} --vcs-prefix-correction "io/shiftleft=src/main/java/" --java $(pwd)/target/yourJarFileName.jar

      env:
        SHIFTLEFT_ACCESS_TOKEN: ${{ secrets.SHIFTLEFT_ACCESS_TOKEN }}
# This workflow integrates Qwiet AI by Harness with GitHub
# Visit https://docs.shiftleft.io for help
name: Qwiet

on:
  pull_request:
  workflow_dispatch:
  push:
    # We recommend triggering a scan when merging to your default branch
    # as a best practice, especially if you'd like to compare the results
    # of two scans (e.g., a feature branch against the default branch)
    branches:
      - main
      - master
jobs:
  ngsast-build:
    runs-on: ubuntu-latest
    steps:
    - uses: actions/checkout@v2

    - name: Download the Qwiet CLI and set permissions
      run: |
        curl https://cdn.shiftleft.io/download/sl > ${GITHUB_WORKSPACE}/sl && chmod a+rx ${GITHUB_WORKSPACE}/sl

    # Qwiet requires Java 1.8
    - name: Set up Java
      uses: actions/setup-java@v1.4.3
      with:
        java-version: 1.8

    - name: Analyze application with Qwiet
      run: ${GITHUB_WORKSPACE}/sl analyze --app ShiftLeftJS --tag branch=${{ github.head_ref || steps.extract_branch.outputs.branch }} --js $(pwd)
      env:
        SHIFTLEFT_ACCESS_TOKEN: ${{ secrets.SHIFTLEFT_ACCESS_TOKEN }}
# This workflow integrates Qwiet AI by Harness with GitHub
# Visit https://docs.shiftleft.io for help
name: Qwiet

on:
  pull_request:
  workflow_dispatch:
  push:
    # We recommend triggering a scan when merging to your default branch
    # as a best practice, especially if you'd like to compare the results
    # of two scans (e.g., a feature branch against the default branch)
    branches:
      - main
      - master
jobs:
  ngsast-build:
    runs-on: ubuntu-latest
    steps:
    - uses: actions/checkout@v2
    - name: Download Qwiet CLI
      run: |
        curl https://cdn.shiftleft.io/download/sl > ${GITHUB_WORKSPACE}/sl && chmod a+rx ${GITHUB_WORKSPACE}/sl
    # Qwiet requires Java 1.8 only for java analysis, 11 is recommended otherwise.
    - name: Setup Java JDK
      uses: actions/setup-java@v1.4.3
      with:
        java-version: 11
    - name: NextGen Static Analysis
      run: ${GITHUB_WORKSPACE}/sl analyze --strict --wait --app ShiftleftKotlin --tag branch=${{ github.head_ref || steps.extract_branch.outputs.branch }} --kotlin .
      env:
        SHIFTLEFT_ACCESS_TOKEN: ${{ secrets.SHIFTLEFT_ACCESS_TOKEN }}
# This workflow integrates Qwiet AI by Harness with GitHub
# Visit https://docs.shiftleft.io for help
name: Qwiet

on:
  pull_request:
  workflow_dispatch:
  push:
    # We recommend triggering a scan when merging to your default branch
    # as a best practice, especially if you'd like to compare the results
    # of two scans (e.g., a feature branch against the default branch)
    branches:
      - main
      - master

jobs:
  ngsast-build:
    runs-on: ubuntu-latest
    steps:
    - uses: actions/checkout@v2

    - name: Download the Qwiet CLI and set permissions
      run: |
        curl https://cdn.shiftleft.io/download/sl > ${GITHUB_WORKSPACE}/sl && chmod a+rx ${GITHUB_WORKSPACE}/sl

    # Qwiet requires Java 1.8
    - name: Set up Java
      uses: actions/setup-java@v1.4.3
      with:
        java-version: 1.8

    - name: NextGen Static Analysis
      run: ${GITHUB_WORKSPACE}/sl analyze --app ShiftLeftTerraform --tag branch=${{ github.head_ref || steps.extract_branch.outputs.branch }} --terraform .
      env:
        SHIFTLEFT_ACCESS_TOKEN: ${{ secrets.SHIFTLEFT_ACCESS_TOKEN }}
# This workflow integrates Qwiet AI by Harness with GitHub
# Visit https://docs.shiftleft.io for help
name: Qwiet

on:
  pull_request:
  workflow_dispatch:
  push:
    # We recommend triggering a scan when merging to your default branch
    # as a best practice, especially if you'd like to compare the results
    # of two scans (e.g., a feature branch against the default branch)
    branches:
      - main
      - master

jobs:
  ngsast-build:
    runs-on: ubuntu-latest
    steps:
    - uses: actions/checkout@v2

    - name: Download the Qwiet CLI and set permissions
      run: |
        curl https://cdn.shiftleft.io/download/sl > ${GITHUB_WORKSPACE}/sl && chmod a+rx ${GITHUB_WORKSPACE}/sl

    # Qwiet requires Java 1.8
    - name: Set up Java
      uses: actions/setup-java@v1.4.3
      with:
        java-version: 1.8

    - name: NextGen Static Analysis
      run: ${GITHUB_WORKSPACE}/sl analyze --app ShiftLeftPython --tag branch=${{ github.head_ref || steps.extract_branch.outputs.branch }} --python .
      env:
        SHIFTLEFT_ACCESS_TOKEN: ${{ secrets.SHIFTLEFT_ACCESS_TOKEN }}
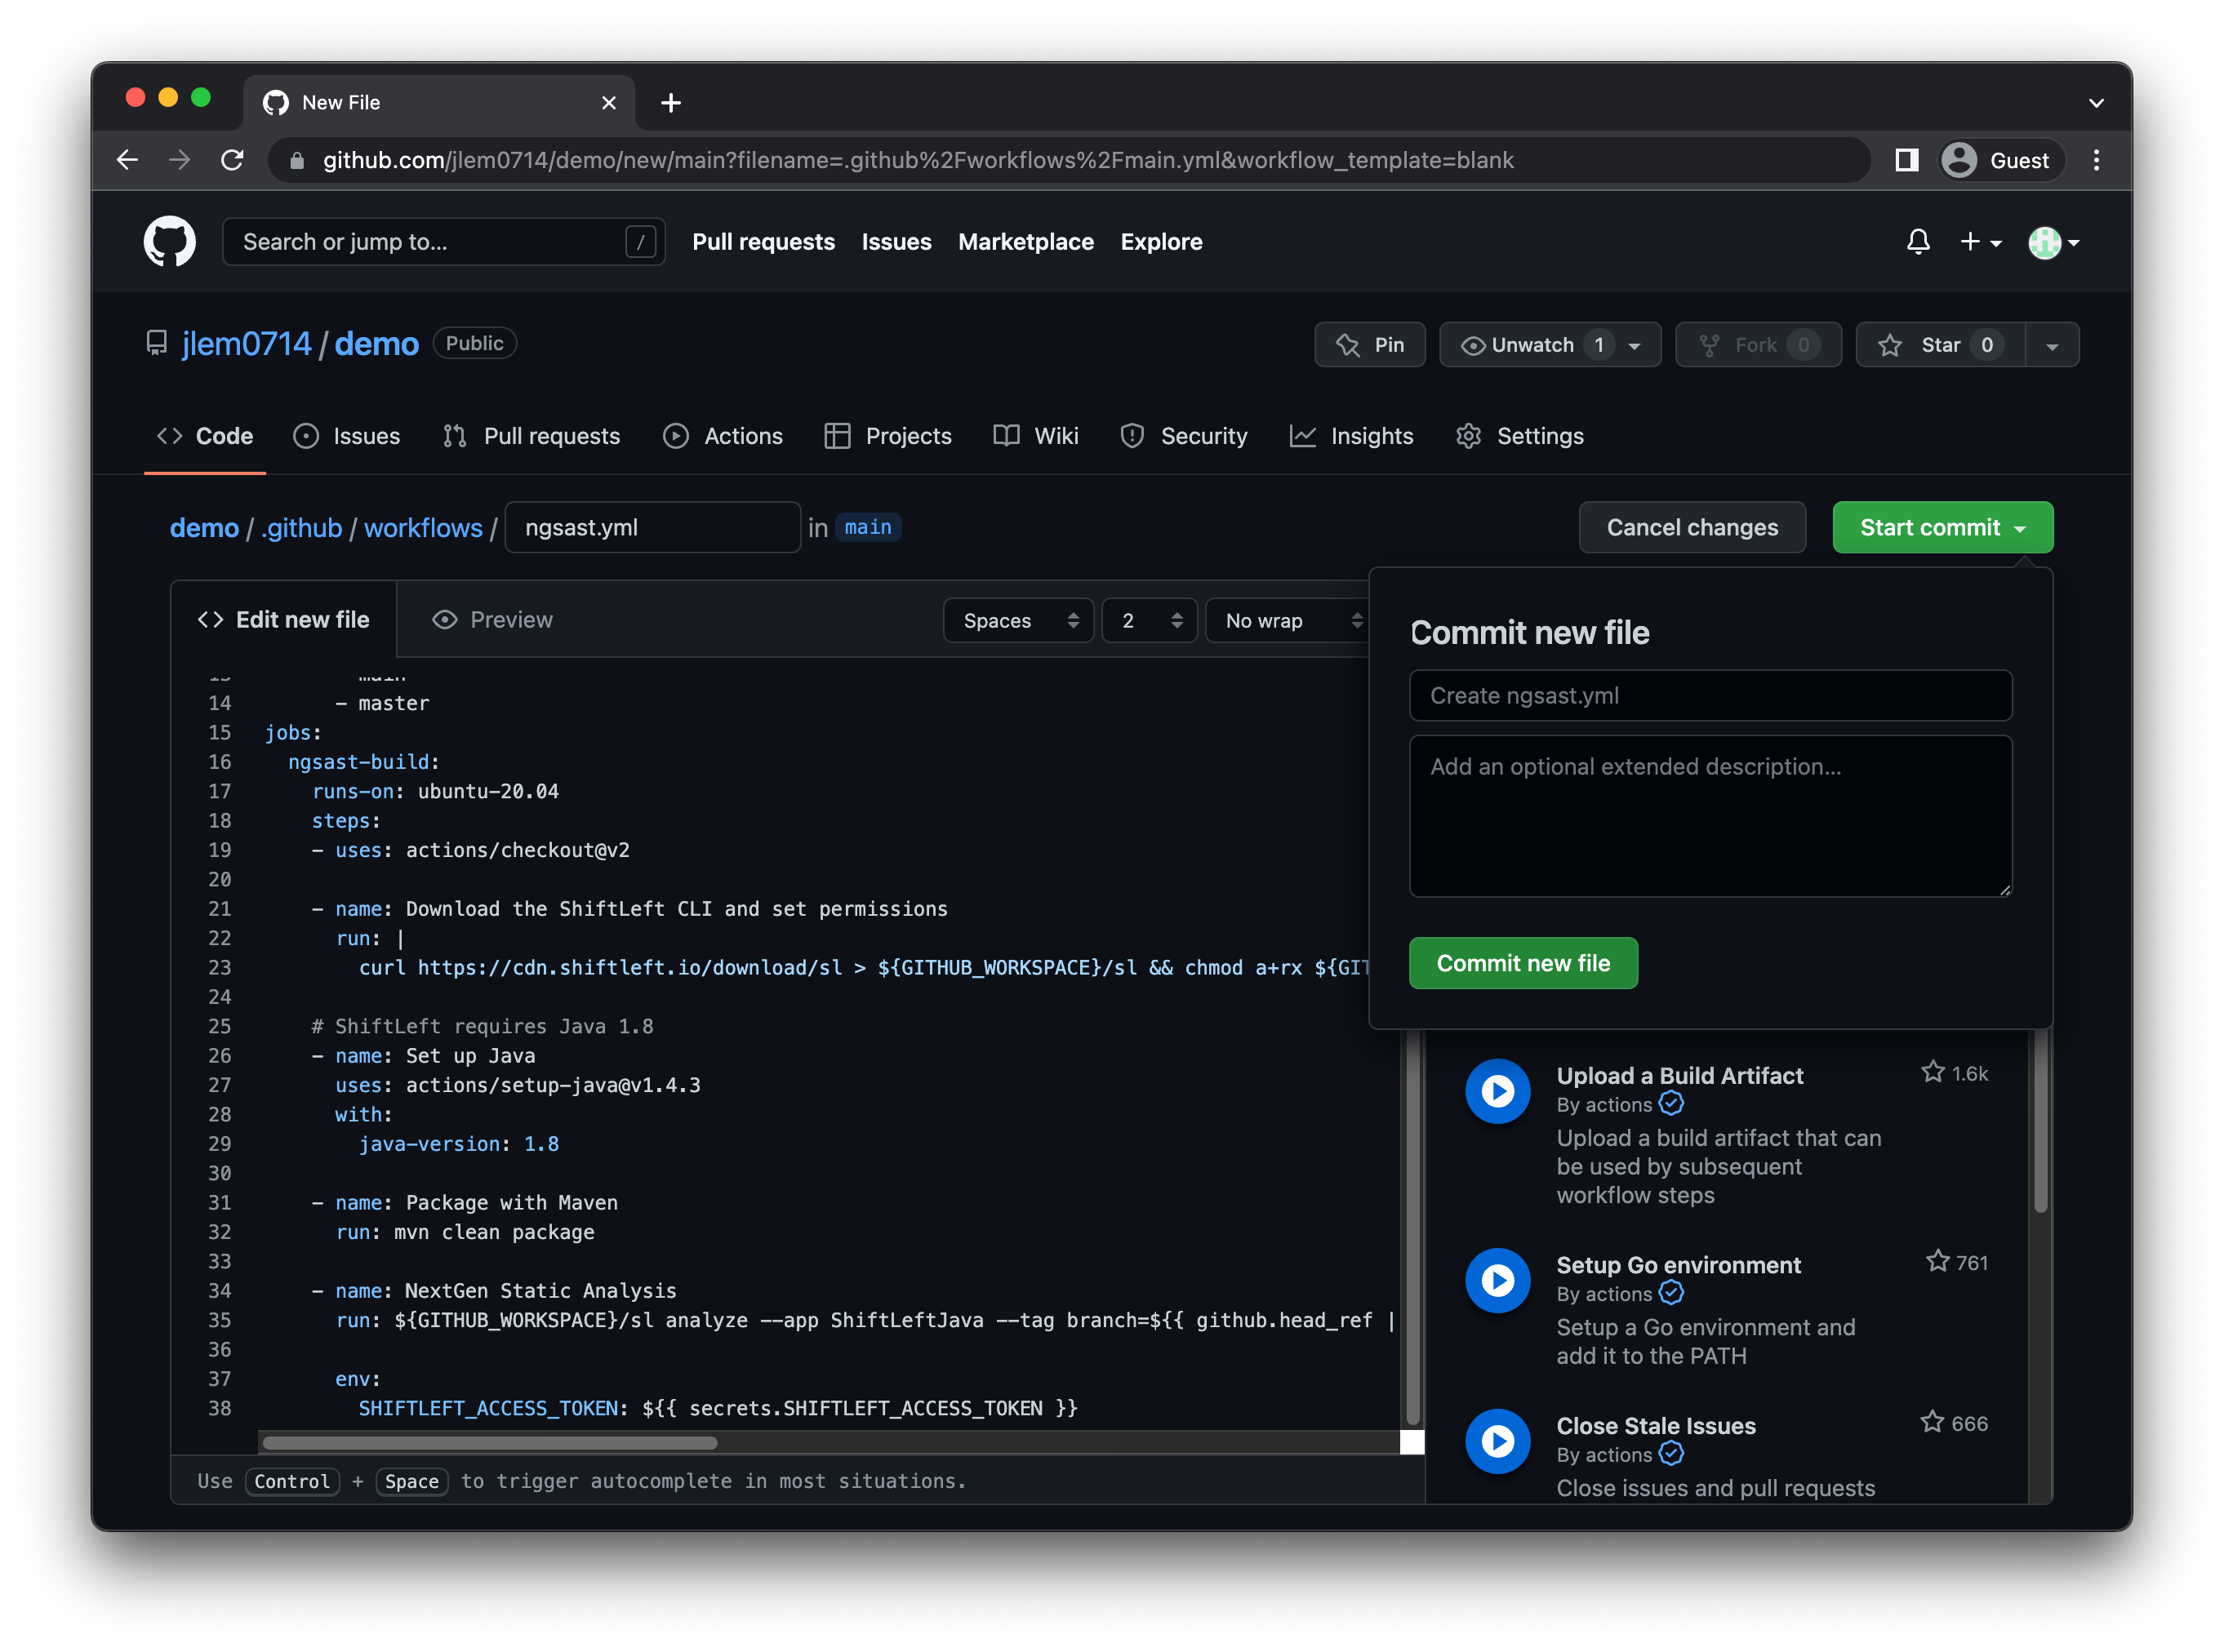
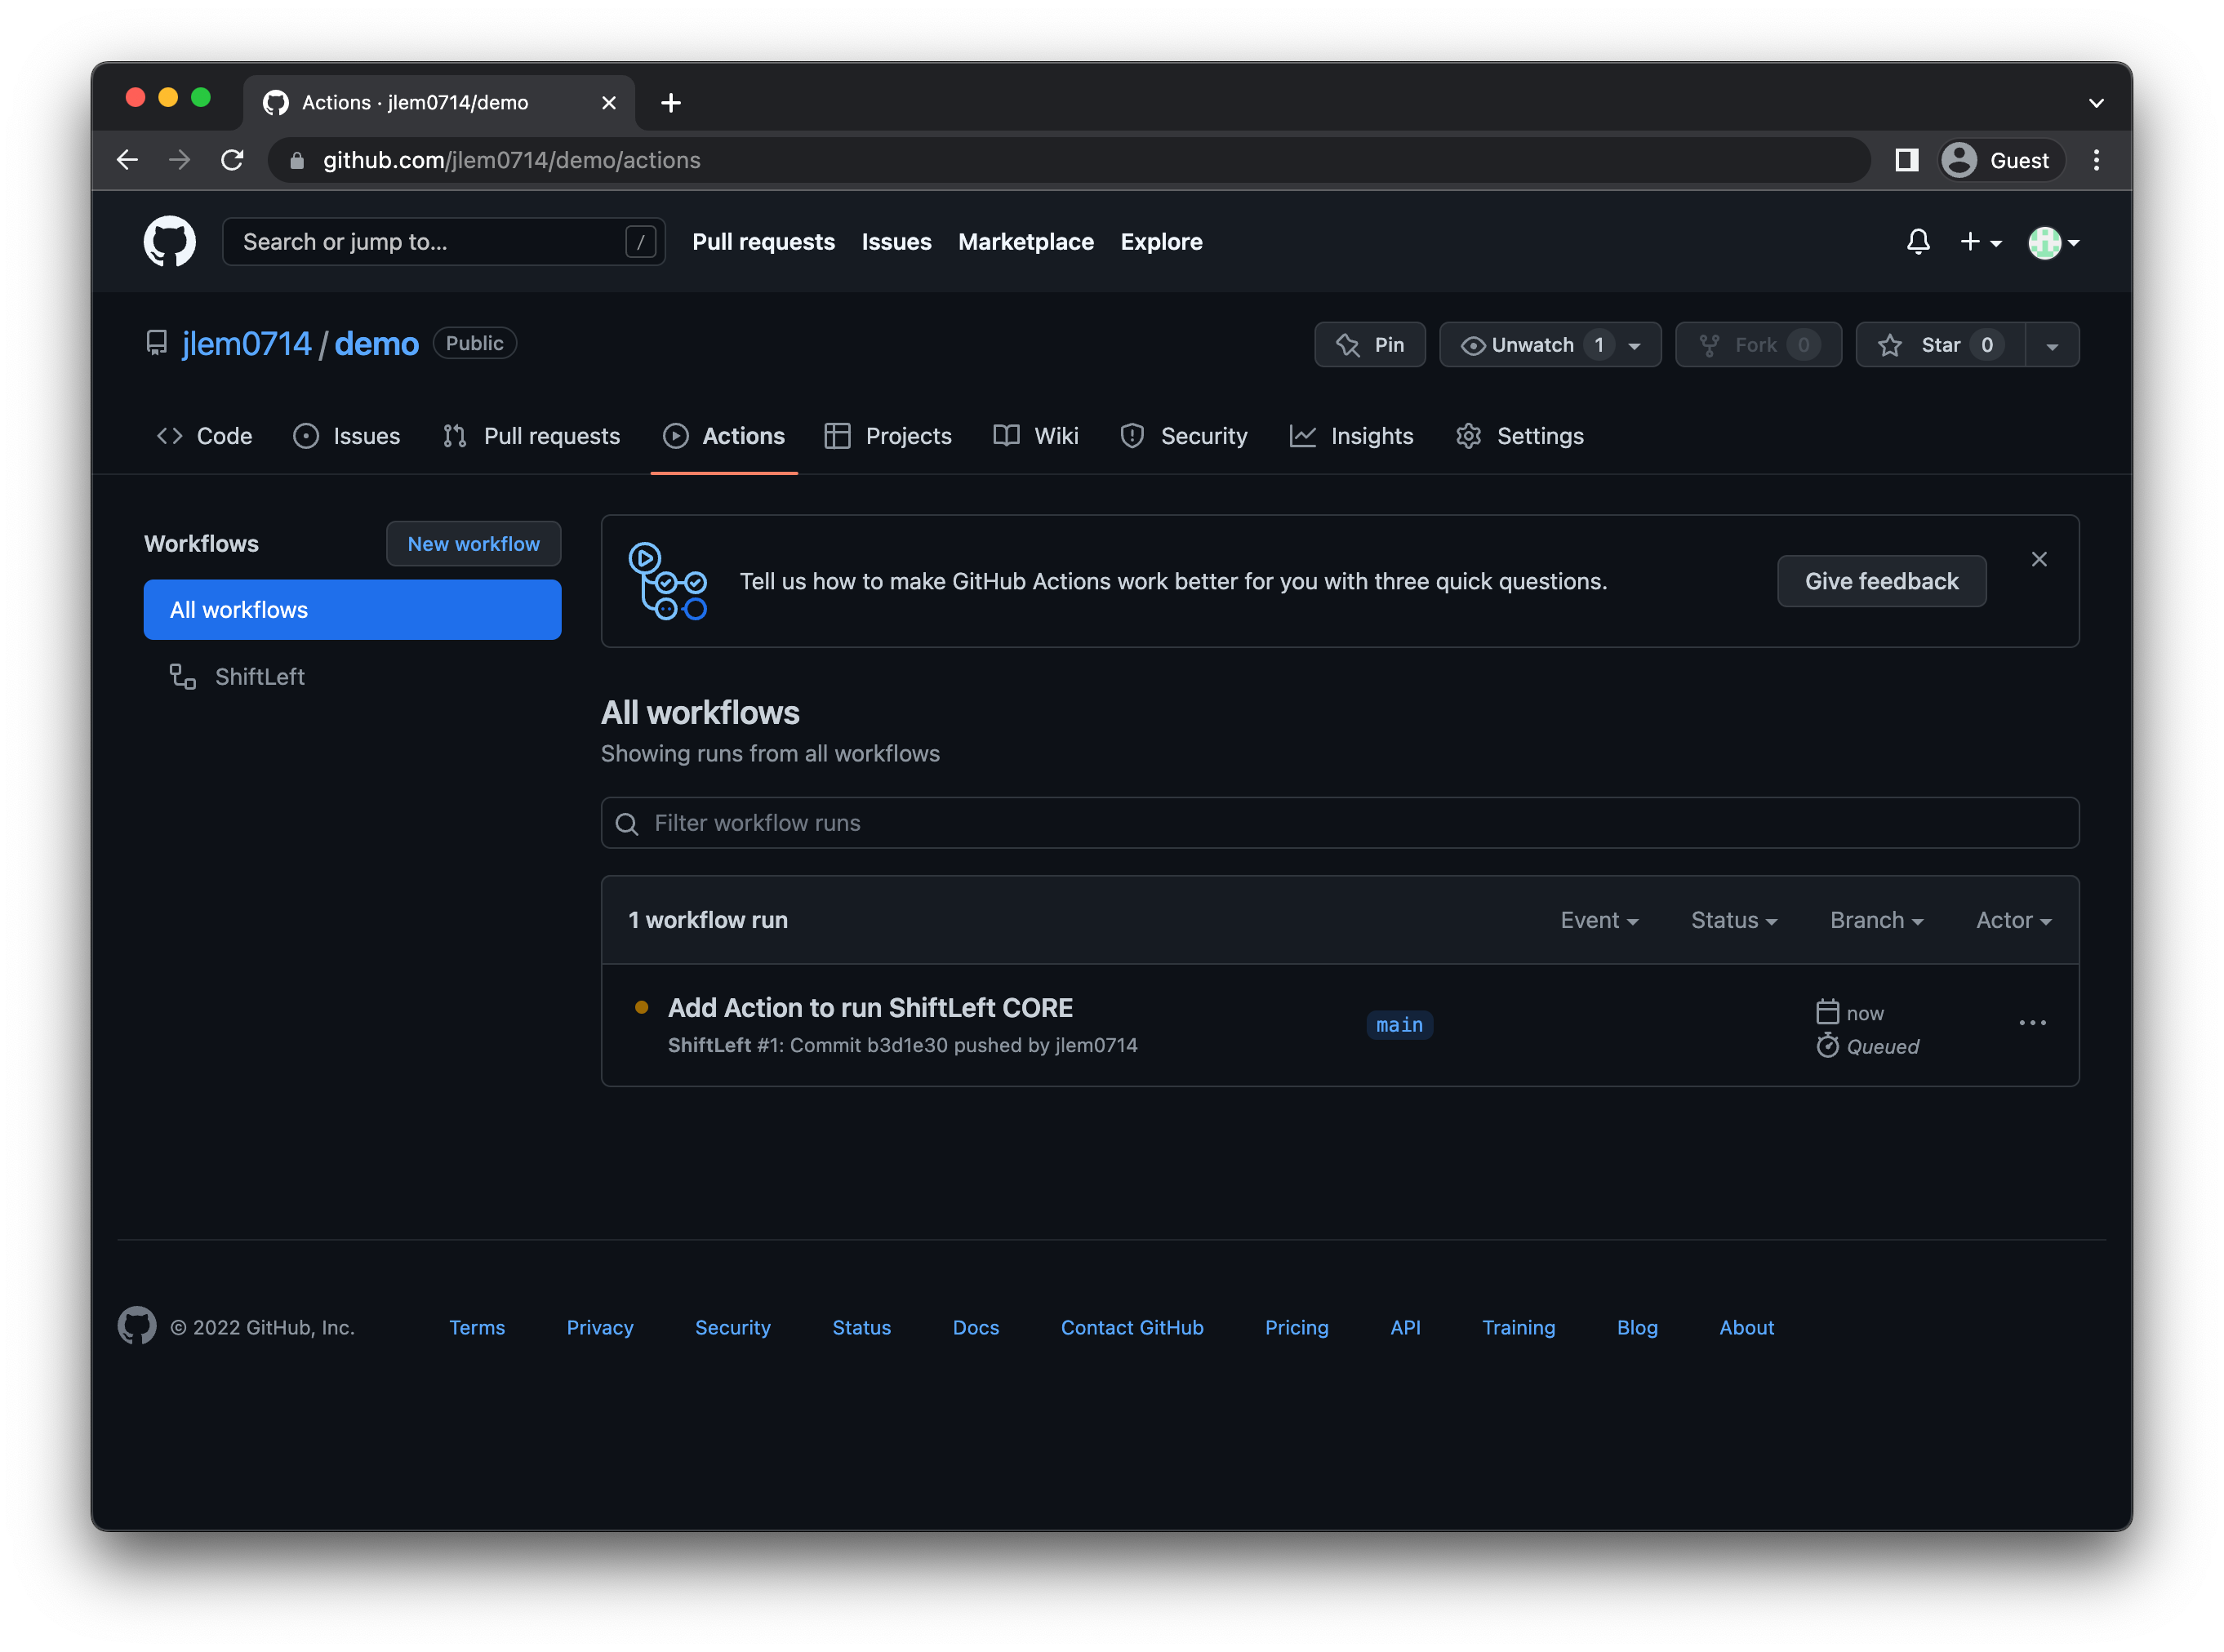
When done, click Start commit and follow the prompts to commit the file to your repo.
You'll see your newly configured workflow listed under the repository's Actions.
Scheduling your code analysis for regular scans
GitHub Actions allows you to schedule jobs to run regularly. You may opt for such a setup to ensure that you are consistently scanning the main branch and therefore have an up-to-date version of code analysis results against which you can compare your scans (e.g., those performed by developers as they work on their projects).
To schedule a regular Qwiet scan, use the schedule event. The following snippet shows how you can schedule a job to run every day at 5:30 and 17:30 UTC:
on:
  schedule:
    # * is a special character in YAML so you have to quote this string
    - cron:  '30 5,17 * * *'
Your updated config file to run Qwiet would be:
name: Qwiet

on:
  pull_request:
  workflow_dispatch:
  push:
    branches:
      - main
      - master
  schedule:
    - cron:  '30 5,17 * * *'
...
Step 3: Test Your Workflow
At this point, you're done with the configuration steps. You can check whether you successfully set up the GitHub Action by triggering the workflow (e.g., by creating a Pull Request).
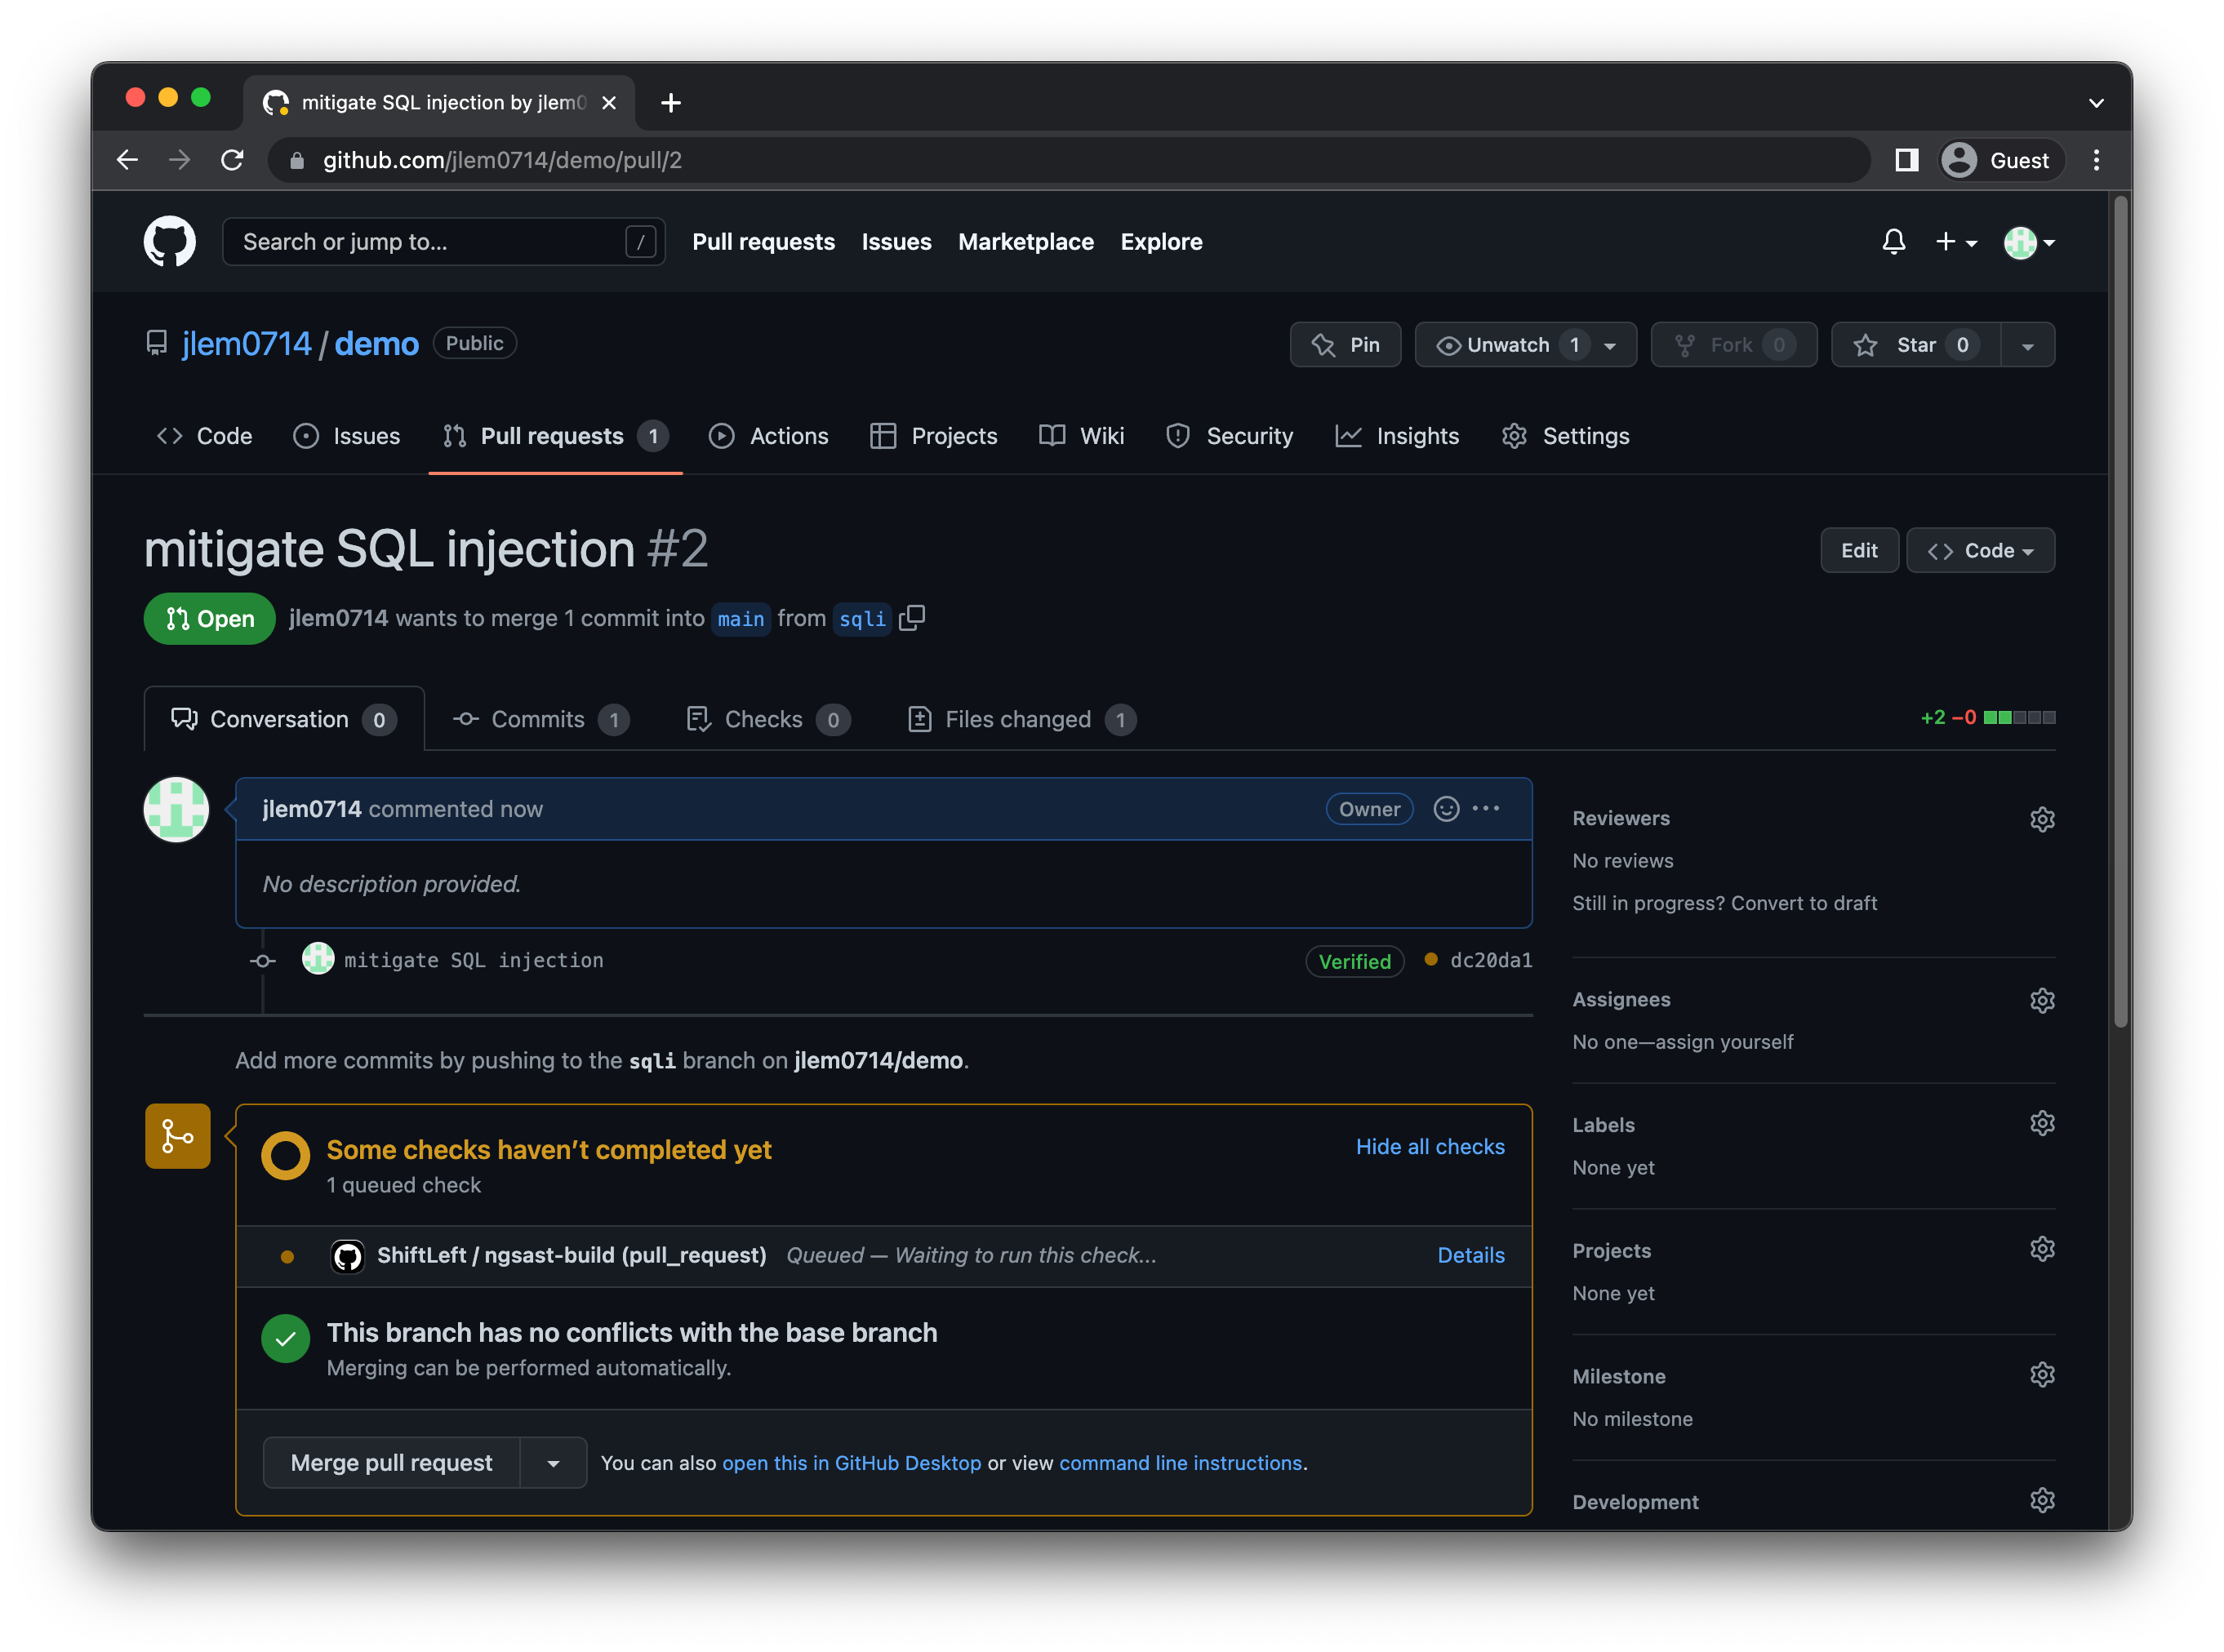
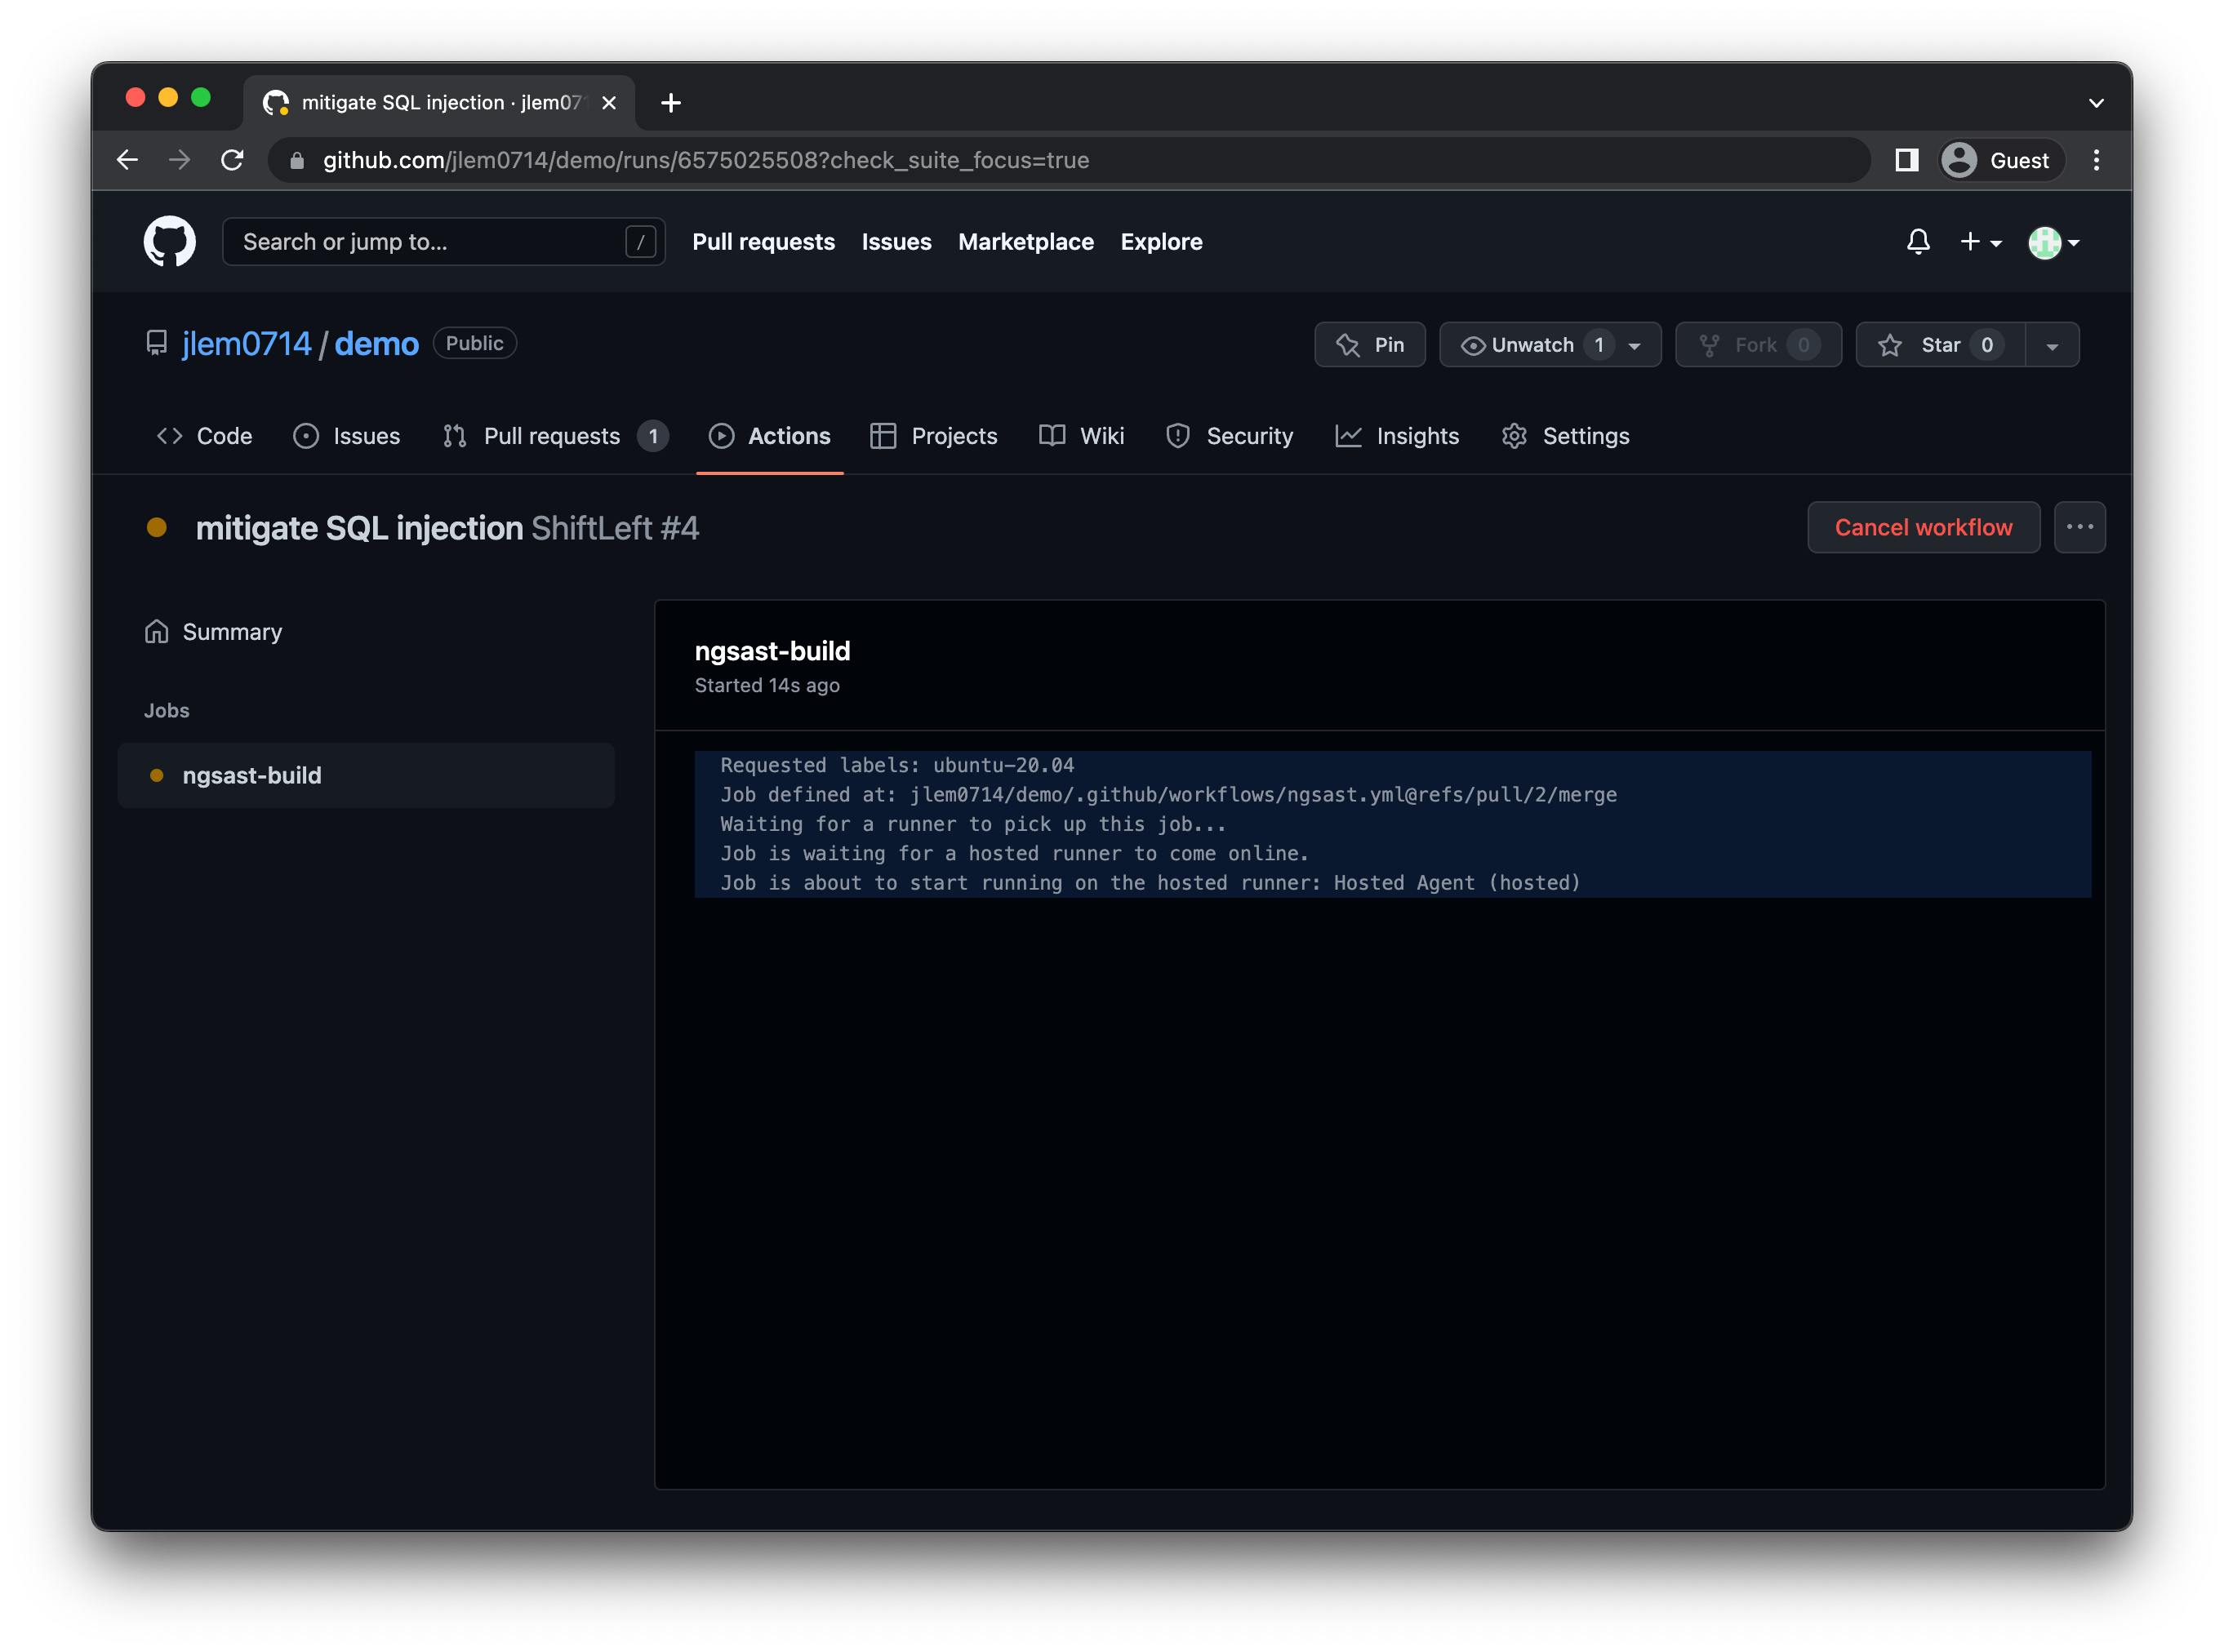
You can click Status for additional details about the workflow's progress:
When done, you can see a summary of the Qwiet AI by Harness results on the PR:
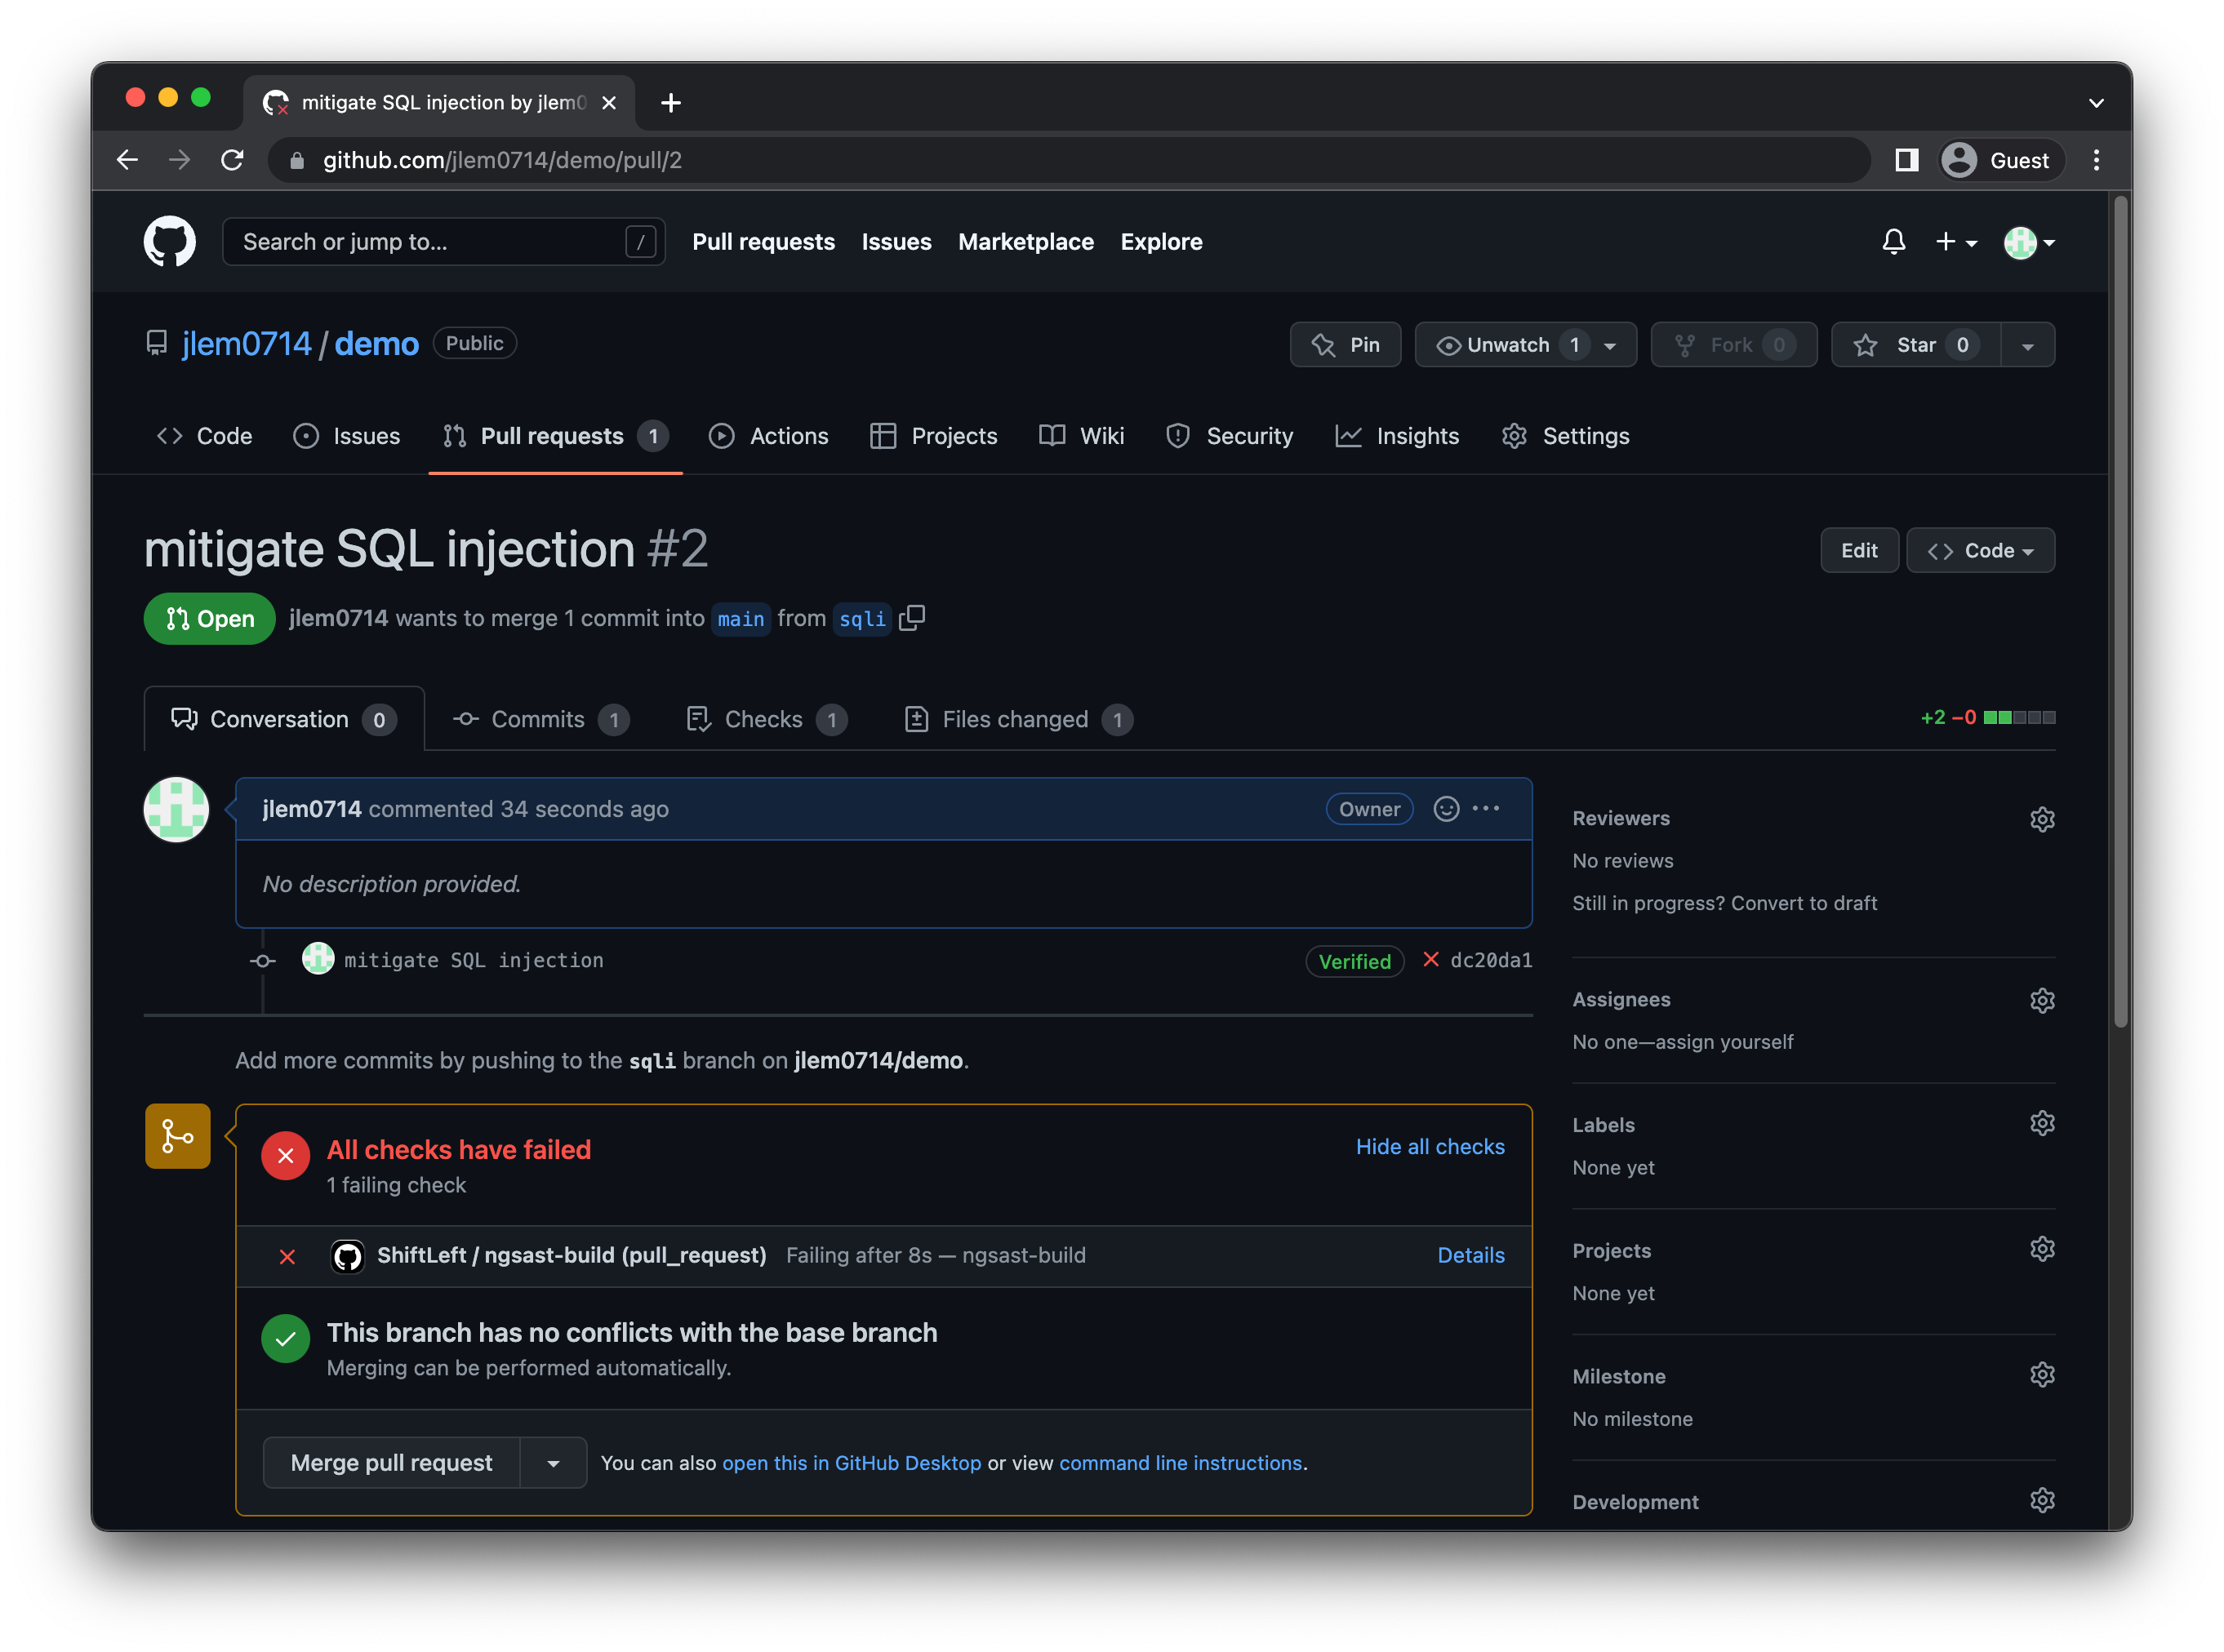
You can get full details regarding the analysis from the Qwiet Dashboard.